Configure employee
Employee configuration in nGenue defines the individuals who interact with the system and assigns them the appropriate business roles, permissions, and operational attributes. These employee records are used throughout the application for workflow ownership, authorization, reporting, deal management, risk controls, and commission processing. A properly configured employee ensures that transactions and activities can be correctly attributed, monitored, and audited across the natural gas lifecycle.
Prerequisites
Before working on the Employee screen, ensure the following prerequisites are met:
- Ensure the nGenue application is installed and use valid login credentials to log into the application.
- Configure the user permissions including User type, Security user, Security group, Security assign user, and Security assign permissions in their respective screens to enable access to the Employee screen.
- Ensure LDC, LDC rate/rider and service workflows are properly configured and active.
- Ensure required departments and roles are already set up.
- Ensure the commission rules (if applicable) are defined.
- Ensure the security settings for SQL or Windows authentication are available.
- Ensure that risk limit structures and supply regions are configured.
Procedure to configure employee
Step 1: Navigate to Employee screen
- Log in to the nGenue application.
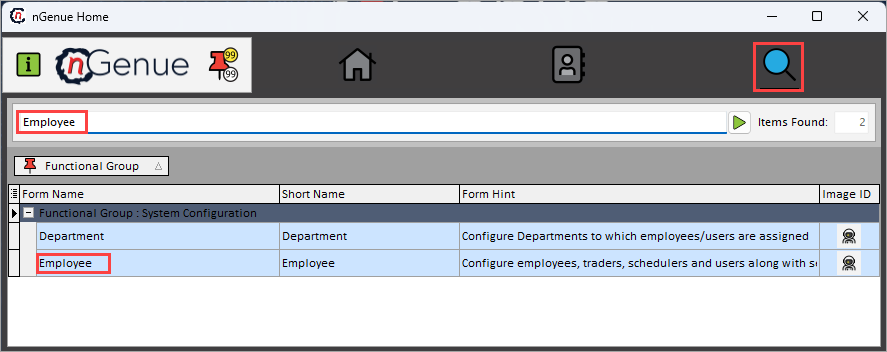
- Click the Search icon and enter Employee in the search bar.
-
Double-click the Employee from the search results to open respective screen.
-
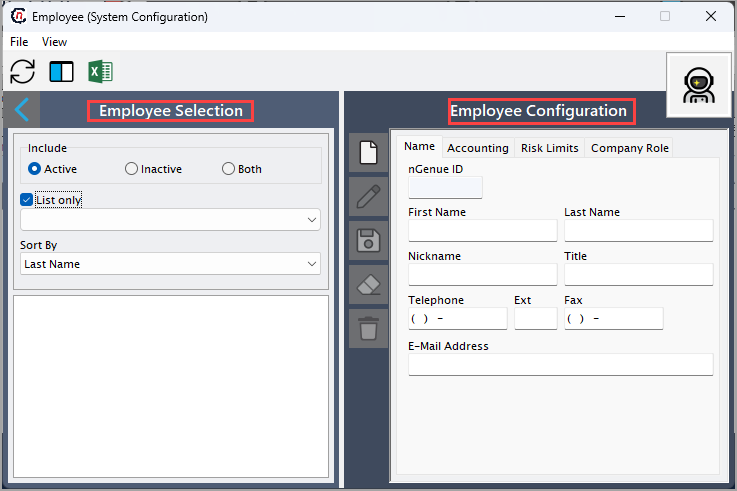
Employee (System configuration) screen has two sections:
-
Employee selection: Provides filters to locate employee records:
- Include: Active, inactive, or both
- List only: Filtered list of employees
- Sort by: Order results by first name, last name, employee no, department, and security level.
-
Employee configuration: Consists of four tabs used to define the details of the selected employee:
- Name tab: Defines the identity and contact information of the employee.
- Accounting: Defines the accounting details of
- Risk limits: Used to assign exposure or operational limits based on region and activity.
- Company role: allows to add and edit and delete company role
-
Step 2: Configure employee
The following table lists the icons available on the Employee configuration section and their respective functions:
| Icons | Icon name | Description |
|---|---|---|
| Add a employee record | Opens a new record form to create a employee entry. | |
| Edit current employee type | Opens the selected record for editing. | |
| Save changes to current employee type | Saves the modifications made to the current record. | |
| Cancel changes to current employee record | Discards unsaved changes made to the record. | |
| Delete current employee record | Permanently removes the selected employee record. |
Step 2.1 : Add a employee
- In the Employee configuration, click the Add a employee record icon to create a new employee record.
-
Complete required fields available in the Employee configuration tab that are listed in the table below:
Name
Fields Description nGenue ID Specify the unique identifier for the employee used internally by the system. First name Specify the employee’s legal first name. Last name Specify the employee’s legal last name. Nickname Specify the preferred name displayed in screens and reports. Title Specify the employee’s job title Telephone Provide contact number used for internal communication. Ext Specify the extension. Fax Specifies the fax number used for internal communication. E-mail address Provide the e-mail address which will be required for notifications, approvals, system alerts. 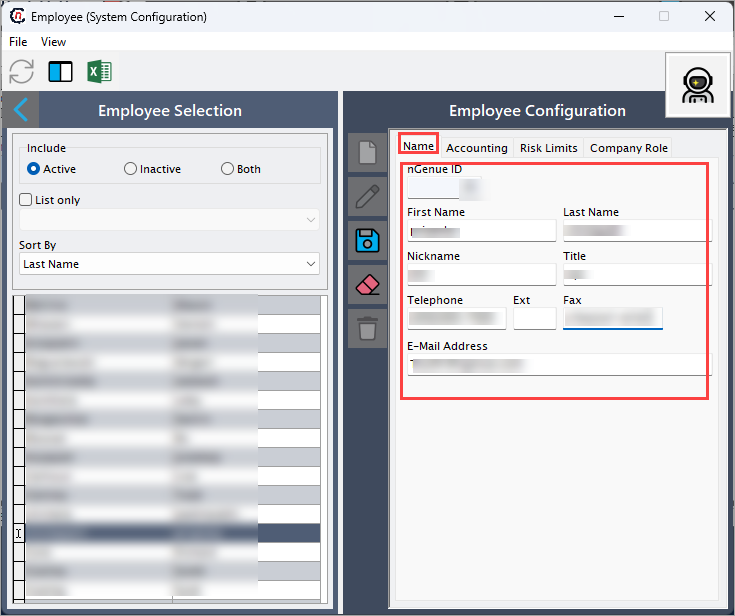
Accounting
Fields Description nGenue ID Specify the unique identifier for the employee used internally by the system. Status Select whether the employee is active or inactive for accounting functions. Manager Select the manager assigned to the employee. Department Select the department designated to the employee. Enable commissions Select this checkbox so the employee will be eligible to receive commissions. Direct commission % (Sales details) Specify the commission percentage applied to sales the employee directly owns. Indirect commission % (Sales details) Specify the commission percentage applied to sales the employee indirectly supports. Threshold amount Specify the minimum amount required before commission calculations apply. SQL auth login name Provide SQL-based login credential for system authentication. Windows auth user name Provide Windows-based login credential for single-sign-on authentication. This employee is supervisor Select this checkbox to marks the employee as a supervisor for departmental approvals. This employee is allowed to void invoices Select this checkbox to grants permission to void invoices within accounting workflows. 
Risk limits
Fields Description ID # Specifies the official name or description of the facility. Supply region Specifies the date and timestamp when the activity logged. Limit name Describes the action or event. Value Specifies the name of the user who logged the activity. UOM Specifies the source where the activity logged from. Currency Describes the action or event. Start date Specifies the name of the user who logged the activity. End date Specifies the source where the activity logged from. Date modified Specifies the source where the activity logged from. Modified by Specifies the source where the activity logged from. Company role
Fields Description Employee Specify the name of the employee being assigned a role. Role ID Specify the system ID representing a predefined permission group. Role name Specify the descriptive name of the role. -
Click Save changes to current employee to store the configuration.
Step 2.2 : Edit a employee
- Click the Edit a employee record icon to modify the selected employee record.
- Update necessary details and click Save changes to current employee to apply changes.
Step 2.3 : Delete a employee
Click the Delete current employee record icon to permanently remove the employee record.
Summary
Employee configuration in nGenue establishes the identity, permissions, business roles, risk constraints, and accounting attributes required for daily system operations. Proper employee setup ensures that activities such as trading, scheduling, billing, sales, and risk monitoring are accurately tracked and associated with the responsible individuals.