Configure security user
The Security user screen is the starting point for providing nGenue access to a new user. You can create new user or employee records with login details and contact information. Once the record is saved, the system automatically generates a unique user ID and links it to the corresponding employee record.
The following table lists the icons available in the Security user screen and their respective functions:
| Icons | Icons name | Description |
|---|---|---|
| Add a user record | Creates a new user record. | |
| Edit current users | Opens the selected user record for editing. | |
| Save changes to current users | Saves the changes made to the current user record. | |
| Cancel changes to user record | Discards any unsaved changes to the current user record. | |
| Delete current user record | Permanently deletes the selected user record. |
Prerequisites
Before working on the Security user screen, ensure the following prerequisites are met:
- Ensure the nGenue application is installed.
- Use valid login credentials to access the application.
- The User type must be configured in the User type screen before adding a new security user.
Procedure to add a security user
Step 1: Navigate to the Security user - configuration screen
- Log in to the nGenue application.
- Click the Search icon and enter security user - configuration in the search bar.
-
Double-click Security user - configuration to open the corresponding screen.
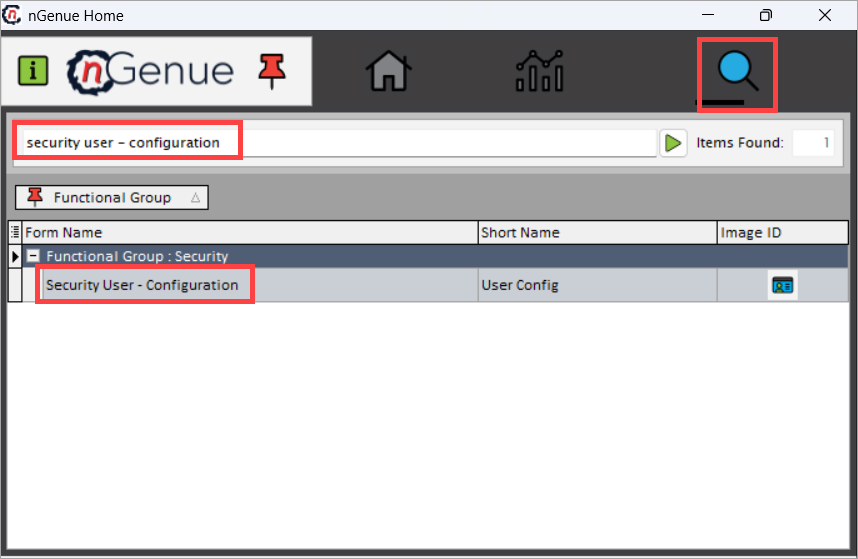
-
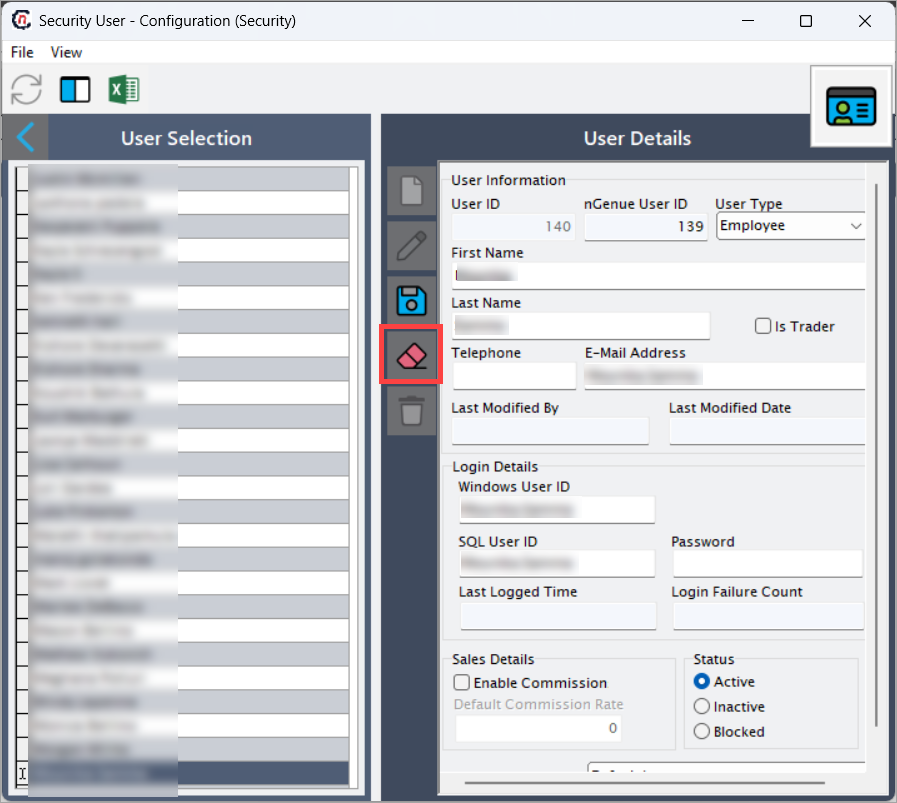
The screen consists of two sections:
- User selection: Displays existing users in the system.
-
User details: Allows you to add, modify, or delete users.
Step 2: Add a security user
-
In the User details section, click the Add a user record icon.
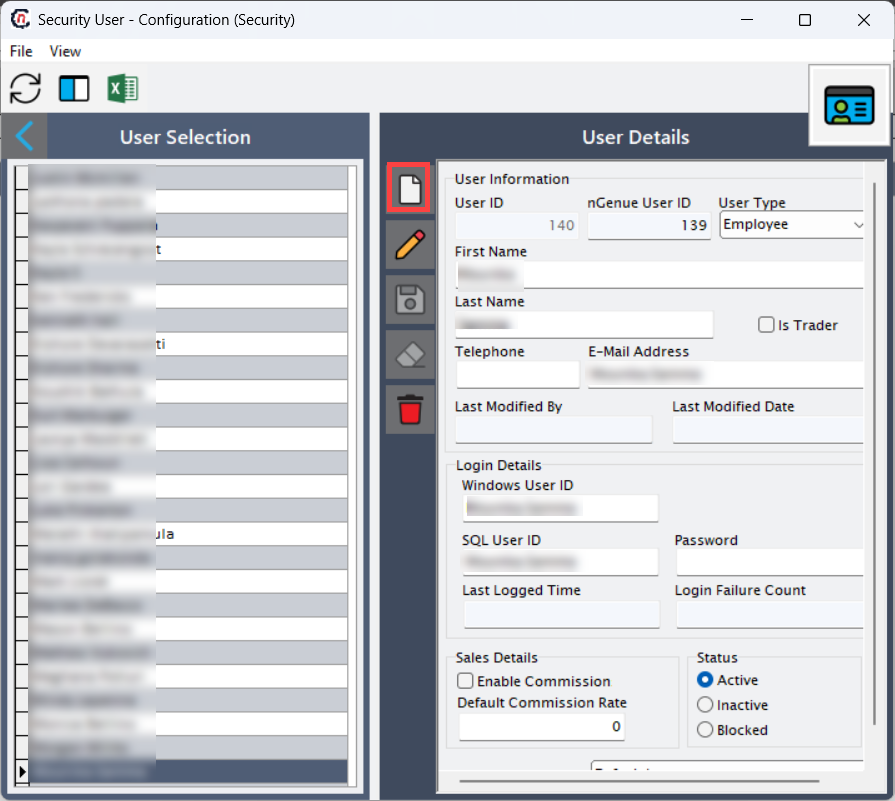
-
Enter the following details to configure the security user:
Field Description User ID (Unique security user ID) Automatically generated by the system. nGenue user ID Automatically generated by the system. Employee ID Automatically generated based on the linked employee record. First name Enter the user's first name. Last name Enter the user's last name. Telephone Enter the user's contact number. E-Mail Enter the user's email address. User type Select the appropriate user type from the dropdown configured in the User Type screen. Is trader Enables the user to be included in trading limits. Windows user ID Enter the Windows login ID if applicable. SQL user ID Enter the SQL login ID if applicable. Password Enter the password for the user account. Last logged time Displays the most recent login timestamp (system-generated). Login failure count Displays the number of unsuccessful login attempts. Enable commission When enabled, allows configuration of default commission rate information. Only users with Enable commission selected appear as Primary sales representatives in the End User screen. This has no impact on wholesale deals. Status Indicates the current status of the user:
Active: Grants the user access to the system.
Inactive: Temporarily disables user access without deleting the record.
Blocked: Prevents login due to policy violations or administrative restrictions.Home screen layout Defaults to the standard layout until new layouts are defined. -
Click the Save changes to current users icon to save and configure the new user record.

Step 3: Edit a security user (optional)
- In the Security user screen, select the user you want to modify from the User selection list.
-
Click the Edit current users icon.
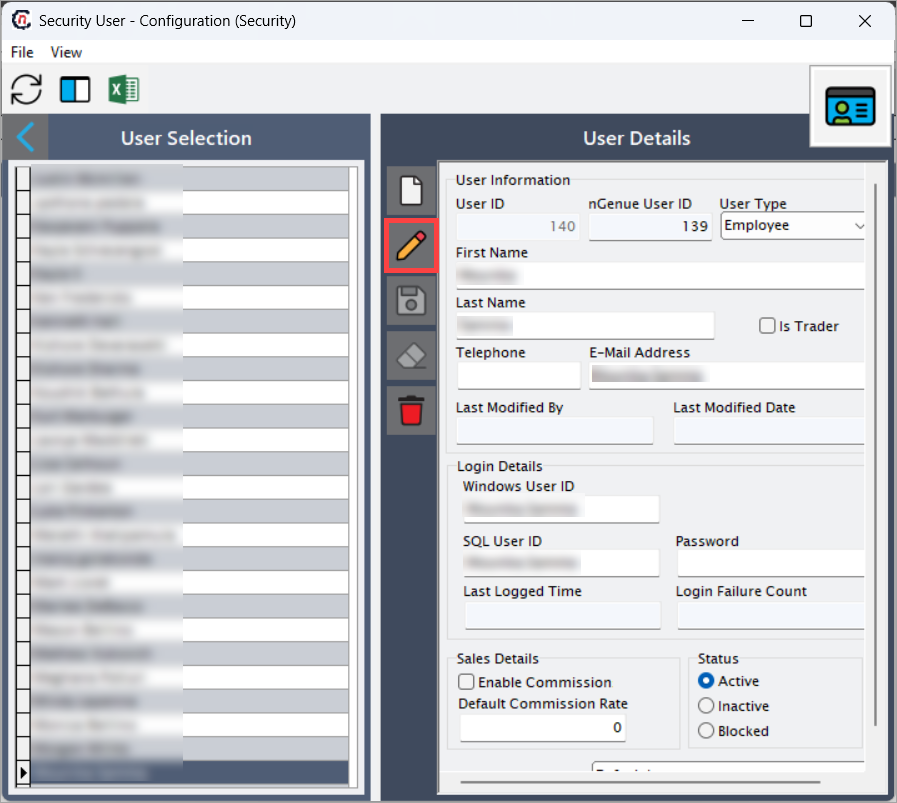
-
Update the required fields such as Contact information, User type, or Status.
- Click the Save changes to current users icon to save the updates.
-
Click the Cancel changes to user record icon if you do not wish to save the modifications.
Step 4: Delete a security user (optional)
- In the Security user screen, select the user record you want to remove from the User selection list.
-
Click the Delete current user record icon.

-
Confirm the deletion when prompted.
Note
Deleting a user record permanently removes it from the system and cannot be undone.
Summary
The Security user screen allows administrators to create, edit, and manage employee access within the nGenue application. By following the outlined procedures, you can efficiently manage user records from creation to deactivation ensuring secure and controlled access to system resources.