Transfer facility to new pool
In day-to-day gas operations, facilities do not always remain in the same pool for their entire lifecycle. Changes such as end-user contract restructuring, marketer transitions, operational rebalancing, regulatory directives, or billing corrections often require a facility to be reassigned to a different pool. When this realignment is not handled accurately and at the right time, it can lead to incorrect volume allocation, imbalance calculations, nomination mismatches, and billing discrepancies.
The Transfer Facility to New Pool screen exists to solve this problem in a controlled, date-driven, and auditable manner. It allows users to transfer facilities from one pool to another while preserving historical accuracy and ensuring that only the intended effective period is impacted. By enforcing effective dates and optional inheritance from the end user, this feature ensures that downstream processes, such as volume management, nominations, billing, and settlement, continue to operate correctly and consistently.
Prerequisites
Before using the Transfer Facility to New Pool screen, ensure the following prerequisites are met:
- The user has add or modify permissions for the Transfer Facility to New Pool screen.
- The LDC is configured and active.
- Both the current and target pools are configured and active.
- The end user and facility exist and are active.
- The operational and billing impact of the pool transfer has been reviewed and approved.
Procedure to transfer a facility to a new pool
Step 1: Navigate to the Transfer Facility to New Pool screen
- Log in to the nGenue application.
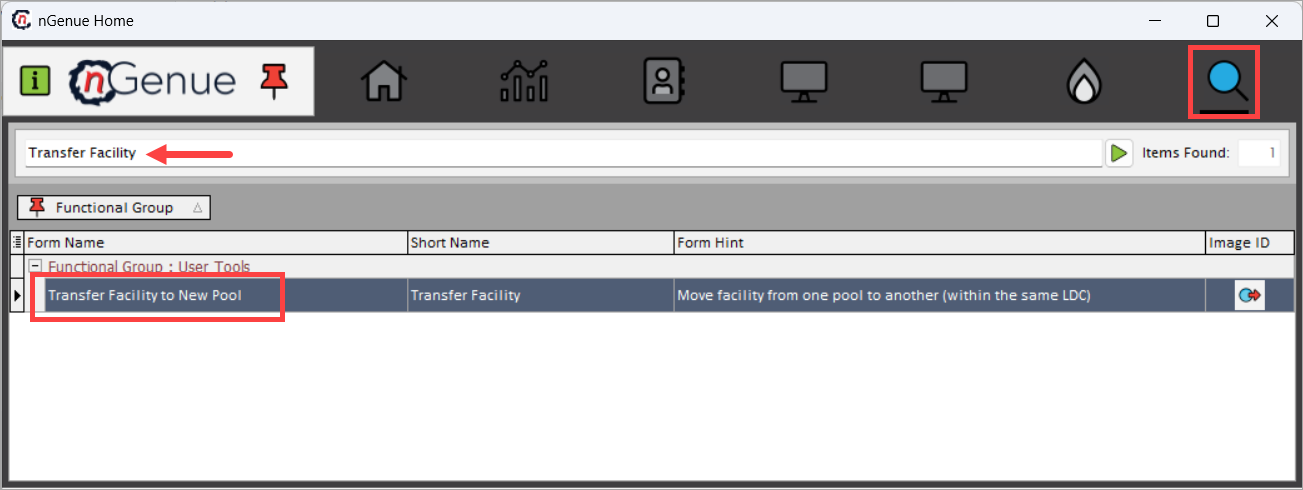
- Click the Search icon and enter Transfer Facility in the search bar.
-
Double-click Transfer Facility to New Pool to open the Transfer Facility to New Pool (User Tools) screen.
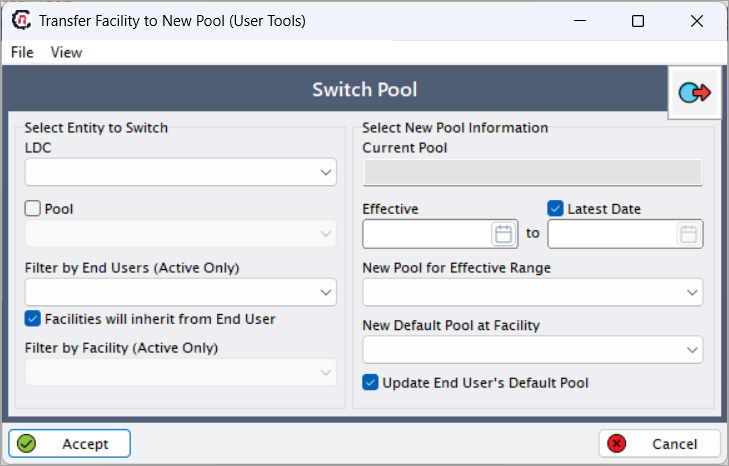
-
The Switch Pool section is displayed, allowing users to define both the source and destination pool details.
Step 2: Select entity to switch
Use the Select Entity to Switch section to identify which facilities are eligible for transfer. This section defines who and what is impacted by the pool transfer.
| Fields | Description |
|---|---|
| LDC | Identifies the Local Distribution Company under which the facility and pool relationship exists. This selection controls all downstream pool options. |
| Pool | Displays the current pool from which the facility will be transferred. This represents the facility’s existing operational grouping. |
| Filter by End Users (Active Only) | Allows users to narrow the scope to a specific active end user, ensuring only relevant facilities are available for selection. |
| Facilities will inherit from End User | When selected, all facilities associated with the selected end user automatically inherit the pool transfer, reducing the need for individual facility selection. |
| Filter by Facility (Active Only) | Allows selection of a specific active facility when the transfer applies only to one location rather than all facilities under the end user. This option is disabled when Facilities will inherit from End User checkbox is selected. |
Step 3: Define new pool information
Use the Select New Pool Information section to configure when and where the facility is transferred.
| Fields | Description |
|---|---|
| Current Pool | Displays the pool currently associated with the selected facility or end user. This field is read-only and provided for reference. |
| Effective | Defines the start and end dates during which the new pool assignment is applicable. Outside this range, the original pool assignment remains intact. |
| Latest Date | When selected, applies the pool transfer using the system’s latest applicable effective date logic, typically used for forward-looking operational changes. |
| New Pool for Effective Range | Specifies the pool that will apply only within the defined effective date range. Volumes, nominations, and billing will follow this pool during that period. |
| New Default Pool at Facility | Sets the facility’s default pool going forward, ensuring future transactions and associations use the updated pool configuration. |
| Update End User’s Default Pool | When enabled, updates the end user’s default pool to match the new facility pool, ensuring consistency across newly added or inherited facilities. |
Step 4: Confirm and apply the transfer
- Review the selected LDC, current pool, new pool, end user, facility, and effective date range.
- Confirm that the transfer aligns with billing and operational timelines.
- Click Accept to apply the pool transfer.
- Click Cancel to exit without making changes.
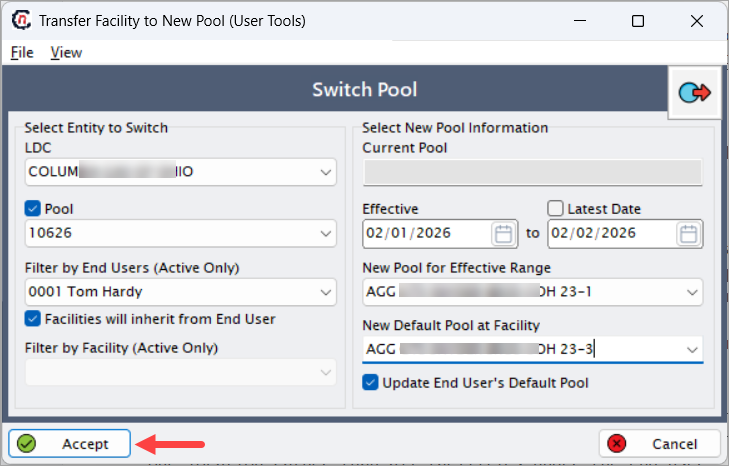
Once accepted, the pool reassignment is applied system-wide based on the defined effective dates.
Key points
- Pool transfers directly affect volume allocation, nominations, billing, and settlement.
- Effective dates ensure historical data remains unchanged outside the transfer period.
- Facilities can be transferred individually or inherited from the end user.
- Updating default pools helps maintain consistency for future transactions.
- This action should be coordinated carefully with billing cycles to avoid discrepancies.
Summary
The Transfer Facility to New Pool screen provides a reliable and auditable way to realign facilities with the correct pool configuration. By combining effective-dated logic, inheritance options, and default pool updates, this screen ensures that operational workflows, volume calculations, and billing processes remain accurate and consistent throughout facility lifecycle changes in nGenue.