Generating cash receipts
After billing is complete and invoices have been issued, you can generate cash receipts for specific invoices belonging to the selected end user in the Cash receipts home page screen. Each cash receipt is applied to a particular invoice and is used to record payment of the outstanding balance.
Prerequisites
Before working on Cash receipts home page screen, ensure the following prerequisites are met:
- User permissions: Configure the user permissions including User type, Security user, Security group, Security assign user, and Security assign permissions in their respective screens to enable access to the Cash receipts home page screen.
- LDC set up: Ensure the Local Distribution Company (LDC) is properly configured, to support invoice processing and cash receipt generation.
- End user and Facility set up: Ensure the End user is fully configured and their Facility is properly set up before generating an invoice or cash receipt.
- Legal entity setup: Additionally, ensure legal entity is configured in the Internal book structure screen to enable proper accounting and cash receipt creation.
- Invoice generation: Invoices must be generated for the selected end user before a cash receipt can be created.
Procedure to generate cash receipts
Step 1 : Navigate to the Cash receipt screen
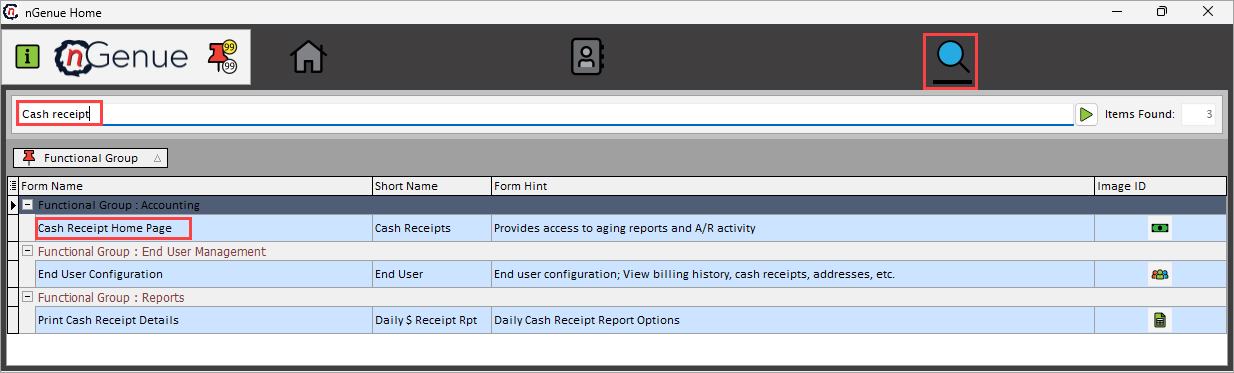
- Log in to the nGenue application.
- Click Search icon and enter Cash receipts in the search bar.
-
Double-click on the Cash receipts to open the Cash receipts home page screen.
Step 2: Adding a new cash receipt batch
-
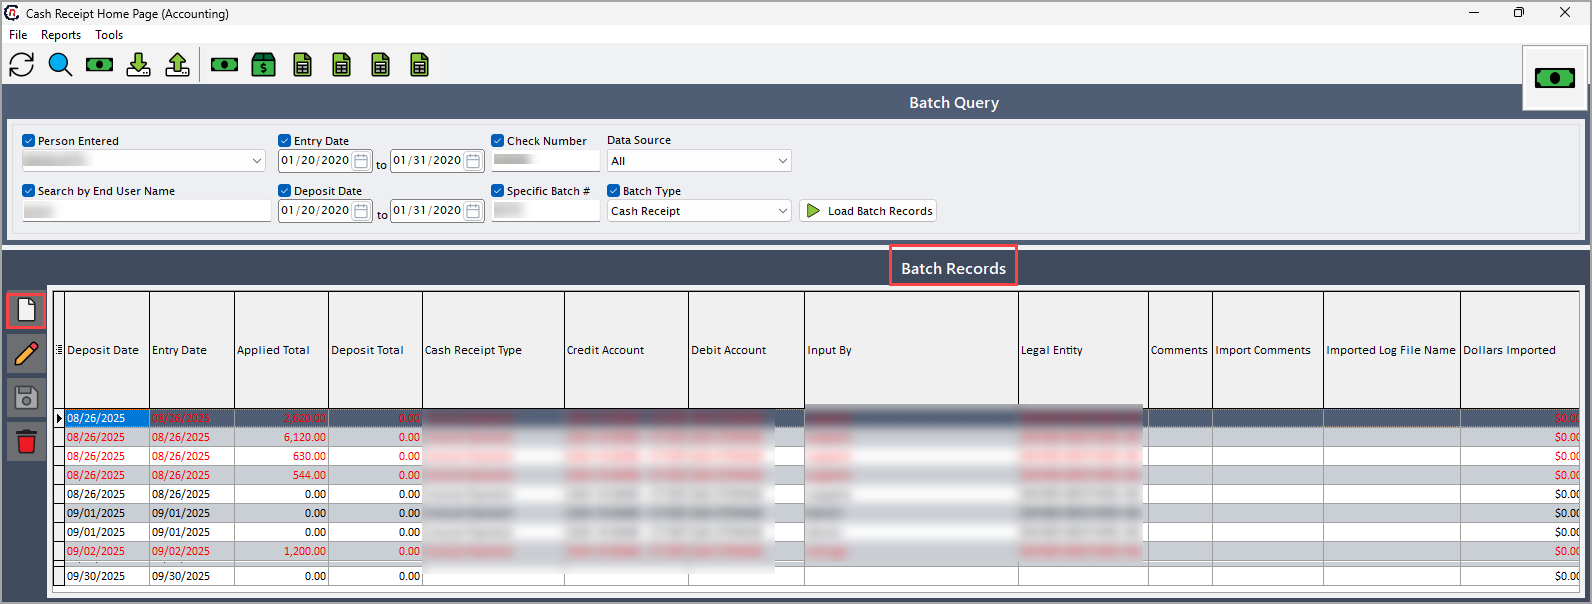
In the Cash receipt home page screen, click Add a new batch icon under the Batch record section, to open the Batch summary pop-up window.
-
On the Batch summary screen, under Batch details section, Click Edit selected batch icon to update batch information.
-
Complete the required fields available in the General deposit information tab of Batch details section.
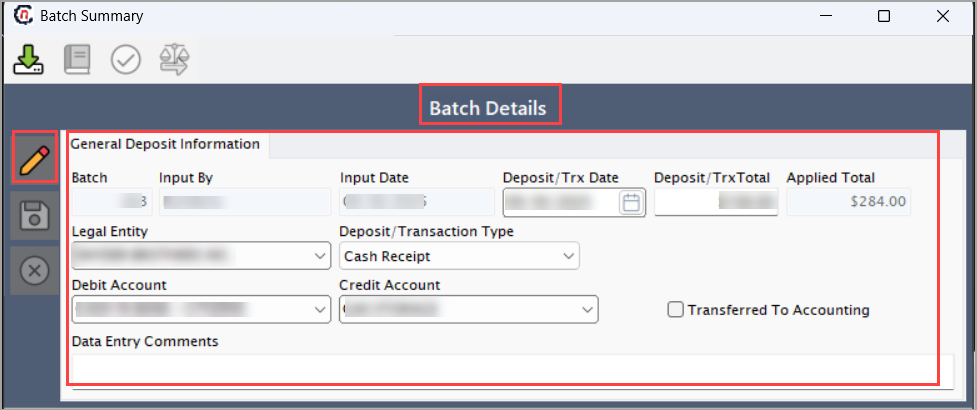
Fields Description Batch Specifies the identifier that is automatically assigned for batch upon creation. Input by Name or user ID of the person who entered the transaction data. Input date Specify the date when the transaction details were originally entered into the system. Deposit/Trx date Enter the actual date the deposit occurred. Deposit/Trx total Specify the total monetary amount of the deposit. Applied total Specify the total amount from the transaction that has been successfully applied or allocated. Legal entity Select the legal entity associated with transaction. Deposit/transaction type Choose the category or type of the deposit or payment (for example, cash, wire, ACH, credit). Debit account Select the financial account that is debited for the transaction. Credit account Select the financial account that is credited for the transaction. Transferred to accounting checkbox Select the checkbox to indicate whether the transaction batch has been posted or transferred to accounting. Data entry comments Provide any additional context or clarification needed to be mentioned. -
Click Save icon to update the changes for the selected batch.
Step 3: Manage batch items and apply cash in the retail tab
-
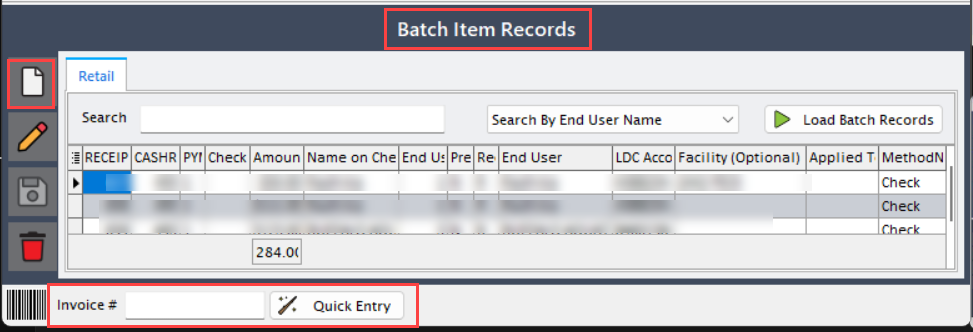
To open Edit receipts screen, there are two ways:
- Click Add new batch item icon in Batch item records (Retail) to open the Edit receipts screen.
-
Alternatively, enter the Invoice number and click Quick entry to open the Edit receipts screen.
-
In the Edit receipts screen, fill in the following fields under the Retail batch detail section:
Fields Description End user Select the end user associated with the specific invoice for which the cash receipt is being generated. Facility Choose the facility tied to specific end user associated with the with the specific invoice for which the cash receipt is being generated. Name on check Enter the name written on the check. Check # Input the check number provided with the payment. Receipt date Specify the date of the payment received. Amount Enter the payment amount. Payment method Select the mode of payment (for example, check, cash, electronic). Prepayment or budget bill payment Select this checkbox to indicate if the payment is a prepayment or a budget bill installment. Cash receipt method Specify the method for recording the cash receipt. This is actually configured in the end user screen under Accounts Receivable (A/R) tab which will be reflected in the Edit receipt screen. Invoices print at Specify at what level the invoices should be printed (For example, end user level, facility level etc). 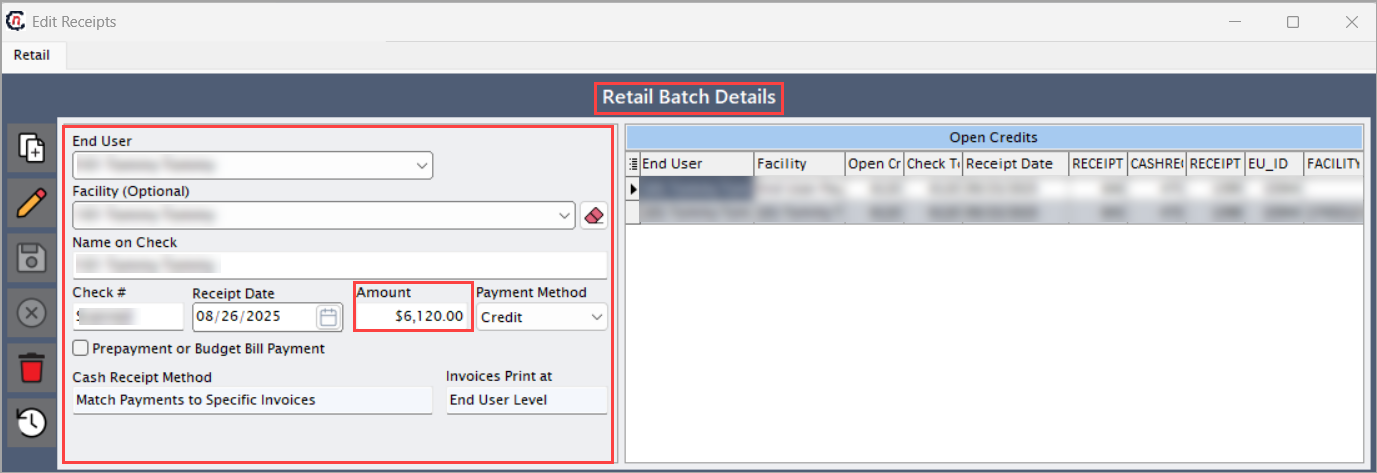
-
Click Save icon to apply the changes to batch item record and to generate a cash receipt.
-
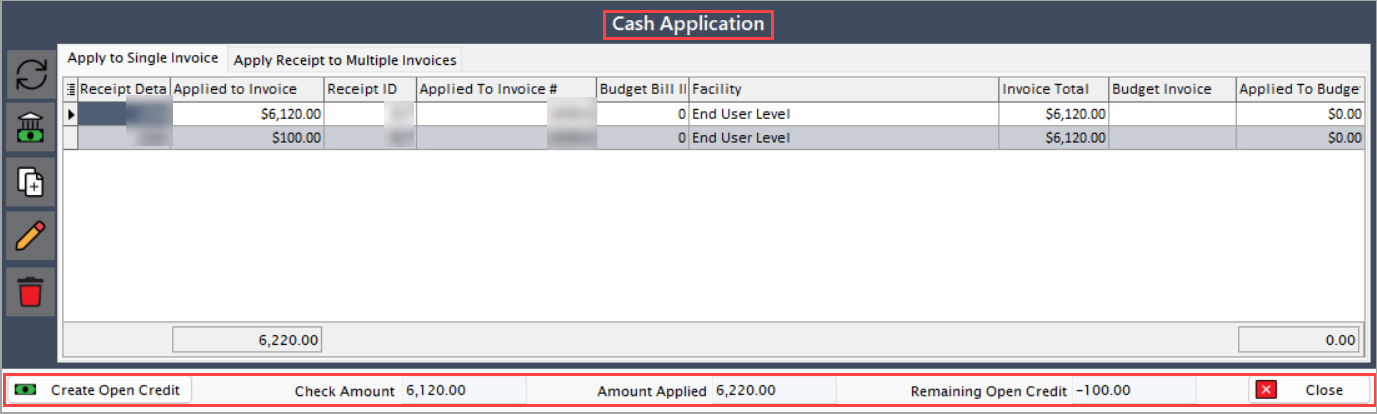
The Cash application section of the Edit receipts screen logs the generated cash receipts and allows managing how payments are applied to invoices, either to a single invoice or multiple invoices.
The following fields provide details about the generated cash receipt and how the payment has been applied:
Fields Description Check amount Specifies the total payment amount received as per the check. Applied amount Specifies the portion of the payment that has been allocated to invoices. Remaining open credit Specifies the balance left from the payment that has not yet been applied and can be carried as open credit. -
Click on Create an open credit to record any unapplied balances as open credit for future use.
-
Click Close to finalize and close the Edit receipts screen.
Summary
Generating a cash receipt records the payment for a specific invoice of a selected end user, links it to the chosen invoice and automatically records the receipts in the Batch records section of the Cash receipts home page screen and in the Cash receipt tab of the End user configuration screen. The payment can be applied to one or multiple invoices, and any imbalances can be resolved by creating an open credit.