Add a sales contract to an end user
A sales contract defines the terms agreed with an end user, including contract type, duration, pricing basis, effective and termination dates, and signer details. It ensures that all commercial and operational conditions are clearly documented for execution and compliance. By capturing these details in a structured format, the system enables transparent communication between the utility and the end user, reducing the likelihood of disputes or missed obligations.
Contracts are created in the Master sales contract screen, where users can set core attributes, adjust standard wording in the Custom language tab, and store related documents in the Contract documents tab. This centralized approach ensures that all sales agreements are consistently managed throughout their lifecycle, from initial creation to renewal or termination.
Steps to add a sales contract
This section outlines the steps to create a sales contract within the application. Each step ensures that both commercial and operational details are recorded properly, allowing accurate execution and monitoring of the agreement.
-
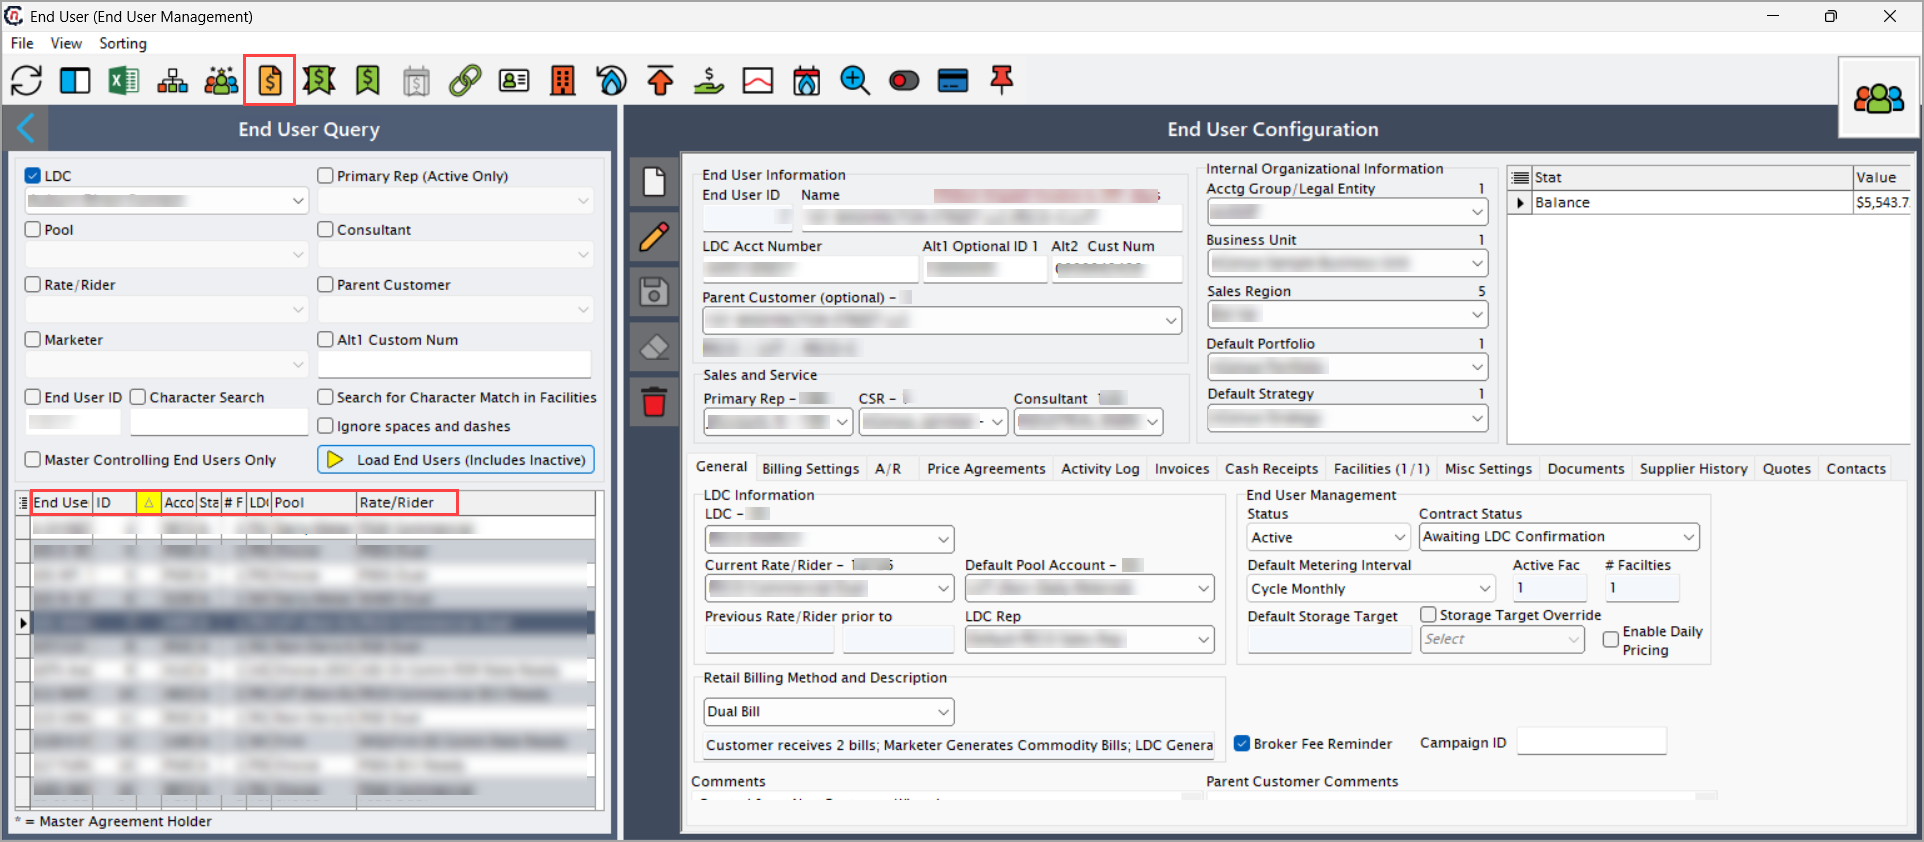
In the End user configuration screen, select the user for whom you want to create a contract. Selecting the appropriate end user ensures that the contract is tied to the right account, keeping customer-level information consolidated.
-
Click the Sales contract icon in the top header. This opens the Master sales contract screen. This screen serves as the central workspace for defining, updating, and reviewing all contract-related attributes.
-
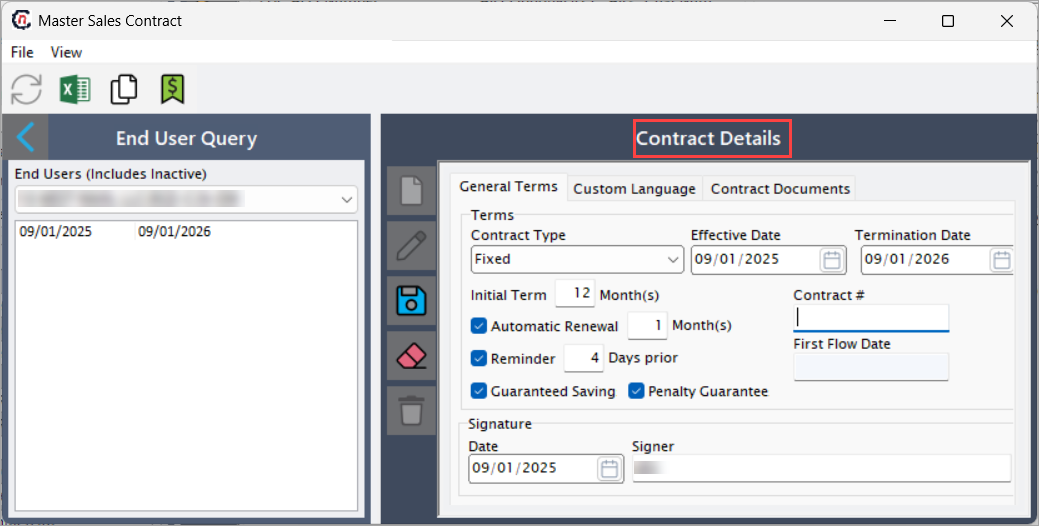
Fill in the required details in the Master sales contract screen as described in the table below. These fields capture the contract's terms and conditions, ensuring all essential details related to execution, renewal, and guarantees are accurately recorded.
Fields Description Contract type (mandatory) Select the type of contract being established, options may include fixed, expired month to month, GSA, index, market sensitive, month to month, NAESB, NYMEX. Used for compliance, categorization, and term application. Effective date (mandatory) Specify the start date of contract validity. Termination date (mandatory) Specify end date of the contract validity. Initial term (months) (mandatory) Specify the initial duration of the contract in months. Required for defining contract length and to determine billing schedules and renewals. Automatic renewal (months) Select this checkbox to specify automatic renewal of the contract in months after the initial term in months completes. Supports contract continuity, customer retention, simplifies contract extensions and prevents service gaps. Reminder (days prior) Select this checkbox to set notification period before expiration. Ensures timely renewal/termination actions and compliance. Guaranteed saving Select this checkbox to apply savings guarantee to the contract. Required for customer assurance. Useful for marketing contracts, financial guarantees, and compliance with regulatory savings claims. Penalty guarantee Select this checkbox to specify early termination penalties. This is used to enforce obligations and mitigate early exit risks. Contract # Provide contract number which is a unique identifier for the contract. First flow date Specify the start date for service delivery. This is calculated automatically upon first delivery. Date Specify the date when the contract was signed. Signer Specify the name of the person who signed the contract. -
In the Custom language tab of the Master sales contract screen, you can modify the standard contract language, specifically for price confirmation and other clauses. This provides flexibility to tailor the contract wording to business-specific needs, unique customer requirements, or regional regulations, while still maintaining a consistent structure across the system.
-
Next, the Contract documents tab stores all related documents associated with the contract, such as signed agreements, terms and conditions, and any legal attachments. It serves as a centralized repository for contract documentation, helping teams access supporting material quickly without navigating multiple systems.
-
Finally, click Save to save the configuration and close the Sales contract screen. This action ensures that the contract is active, stored in the system, and accessible for further reference or future updates.
Once you finish configuring and saving the sales contract, it will be stored in the system and made available for reporting. You can view the finalized contract details later through reports, ensuring they are easily accessible for auditing, compliance, or operational review.