Reviewing LDC rate values
The LDC rate values screen is used to define, configure and review monthly charges that will be automatically applied during the billing cycle. These charges can be structured as flat fees, tiered rates, or other variable-based calculations depending on the utility’s billing requirements.
Through this screen, users can create, update, and review charge definitions that are applied to customers within a specific Local Distribution Company (LDC) and LDC rate class. The system leverages these settings to apply appropriate charges during billing runs, ensuring seamless integration with existing rate definitions and charge structures.
In addition to defining charges, this screen provides a clear overview of all existing monthly charges, making it easier for users to review configurations, perform updates, and generate necessary reports for validation or auditing purposes.
Prerequisites
Before configuring or accessing the LDC rate values screen, ensure the following prerequisites are met:
- The user role includes permissions to access and modify configurations in the LDC rate values screen.
-
Meet the following configurations before configuring new charge values:
- Configure LDC: Navigate to the LDC configuration screen and ensure the LDC is created and active.
- Configure rate class: From the LDC rate class screen, associate the correct rate class with the LDC.
- Configure charge definition: In the LDC charge definition screen, create a charge type (e.g., Flat fee, Tiering, Variable-based) and associate it with the LDC and rate class.
Without these configurations, the LDC rate values screen will not display or allow updates.
-
The rate class defined for the LDC must be linked to the LDC charge definition for the charge to appear in LDC rate values screen.
Procedure to configure the LDC rate value
Step 1: Navigate to the LDC rate value screen
- Log in to the nGenue application.
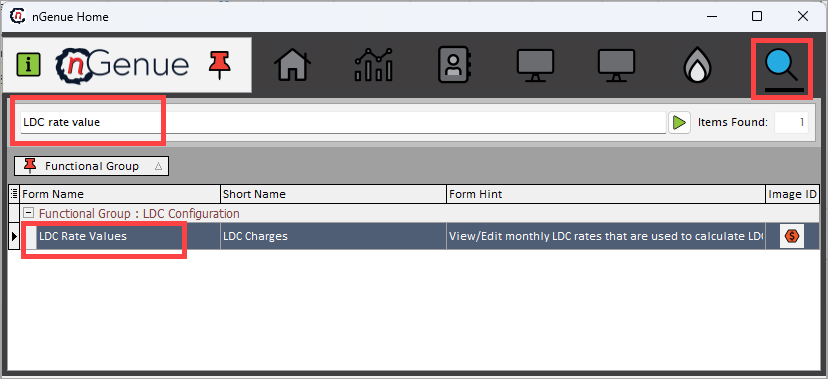
- Click the Search icon and enter LDC rate value in the search bar.
-
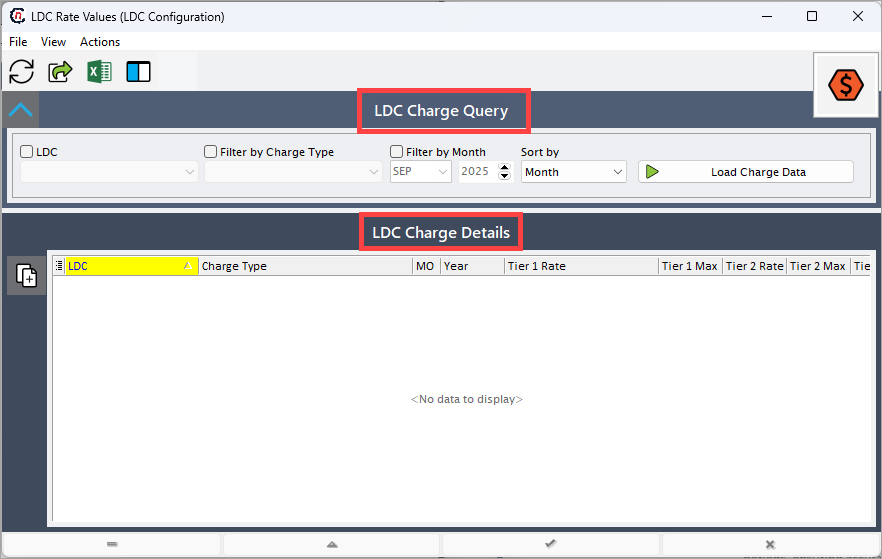
Double-click LDC rate values to open the respective screen. The LDC rate value screen is divided into two main sections:
-
LDC charge query: This section allows users to filter and retrieve specific charge configurations. It helps in identifying which charges are applicable for a given LDC, month, and charge type. Available filters are:
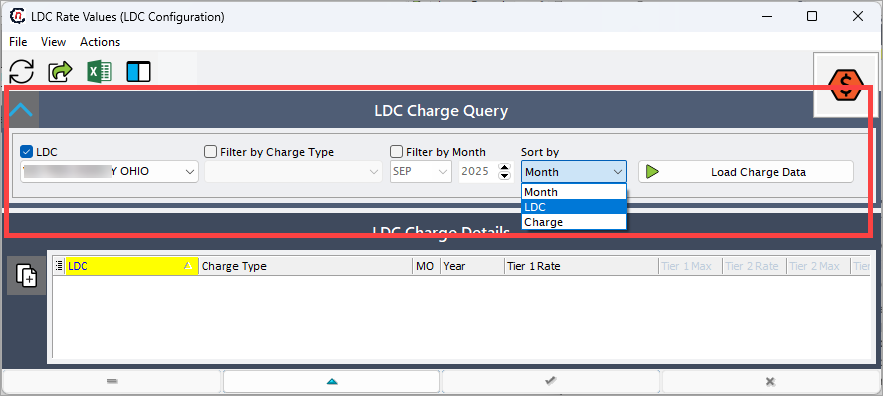
- LDC: Select the utility company for which the users want to view or configure monthly charges. Only charges associated with the selected LDC will be displayed.
- Charge type: Filter by charge definition such as Flat Fee, Tiering, or Variable-based charges. This ensures the correct structure is used during billing.
- Month: Select the billing month for which charges should be displayed or configured. This helps in defining month-specific charge rates.
- Sort by: Allows sorting the displayed results by Month, LDC, or Charge to easily compare and analyze charges across periods or utilities.
- Month: This option arranges the LDC charges based on the selected month. It helps users analyze and compare charges across different billing periods, ensuring accurate tracking.
- LDC: This option organizes charges based on the Local Distribution Company (LDC). It allows users to quickly view and manage charges specific to each LDC, making it easier to verify and apply the correct billing rates.
- Charge: This option sorts charges based on the charge type and structure, such as Flat Fee, Tiering, or Demand Charges. It helps users efficiently categorize and review different charge definitions applied within an LDC.
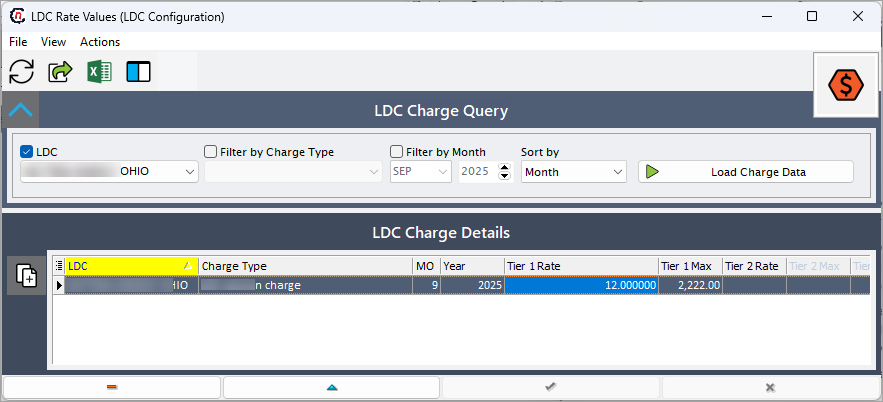
Once the filters are selected, click Load charge data to display existing charge details in the LDC charge details section.
-
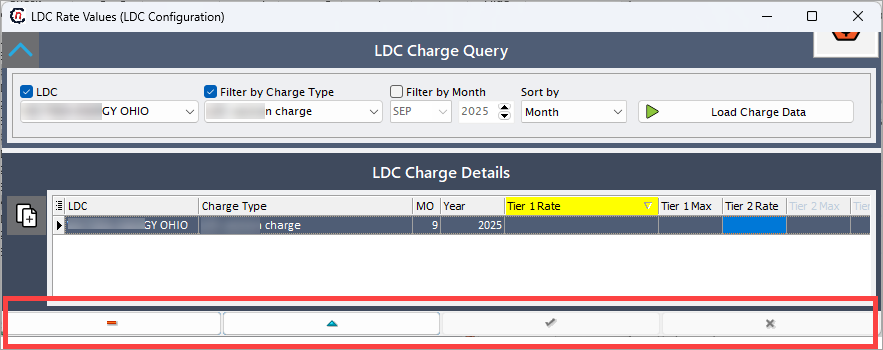
LDC charge details: This section displays charge data based on the selected filters. The system automatically populates relevant records, allowing users to review or modify them. Also, the users can directly modify the Tier rates and Max usage values for each charge type.
Note
To edit a record, click the Edit record (^) button available at the bottom of the LDC rate values screen.
-
Step 2: Configure charge values
- In the LDC charge details section, the users can view the rates and maximum usage for each tier. These details are fetched based on the configuration set in the LDC charge definition screen.
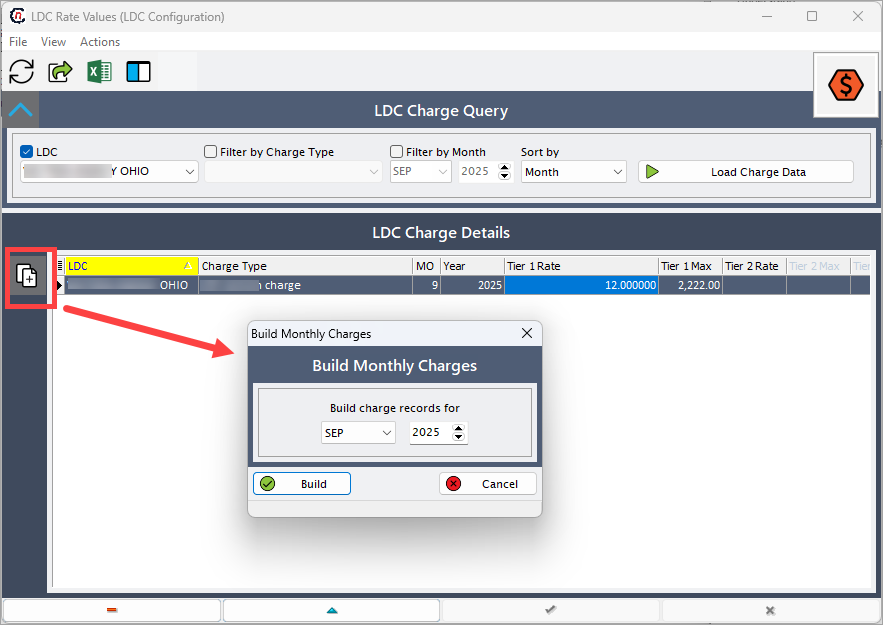
- The system will automatically apply the charges the user enter during the billing cycle. To generate charges for a specific month, click
 , and select the month and year for which the users want to build monthly charges and click on the Build button.
-
The different fields available in the LDC charge details sections are mentioned in the table below:
Fields Description LDC The utility company responsible for distributing gas to users within a specific region. Configured in the LDC configuration screen, where users can define and manage details. The user can use this field as a filter to check applicable charges for users under that LDC. Charge type Defines the structure of the charge, such as flat fee or tiering. Determines how the charge is applied to the user’s billing calculation. Configured in the LDC charge definition screen to ensure correct billing rules. Month (mo) Represents the billing month for which the charges are applicable. Helps in tracking and analyzing charges for a specific period. Charges defined are applicable to this particular month. Year Indicates the billing year in which the charge is applied. Ensures proper record-keeping and compliance with billing cycles. Helps users compare charges across different years for analysis. Tier 1 rate The charge rate applied to consumption within the first tier of usage. Defined in the LDC charge definition screen based on contract terms. Used for billing calculations when a user’s consumption falls in tier 1. Tier 1 max The maximum usage limit for tier 1 before moving to tier 2. Helps determine when the next tier’s rate should apply. Ensures correct charge calculation based on usage thresholds. Tier 2 rate The charge rate applied to usage exceeding tier 1 max but within tier 2 limits. Set in the LDC charge definition screen to structure progressive pricing. Applied during billing when user consumption reaches this tier. Tier 2 max The maximum usage limit for tier 2 before shifting to tier 3. Helps regulate how charges increase with higher consumption. Ensures accurate tier-based charge application. Tier 3 rate The charge rate applied for consumption that falls within tier 3. Typically set higher than tier 1 and tier 2 to encourage efficient usage. Defined in the LDC charge definition screen and used in billing calculations. Tier 3 max The maximum usage limit for tier 3 before moving to tier 4. Helps structure progressive pricing and charge application. Ensures correct tier transitions in billing calculations. Tier 4 rate The charge rate for consumption that falls in the highest tier (tier 4). Typically set at the highest level to manage excessive usage. Applied when a user’s consumption exceeds tier 3 max.
Step 3: Validate and save the configuration
Once the user defines the rates and maximum usage for each tier in the LDC charge details section, click the Save (✔) icon to save the configuration.
Note
The user can edit, delete, or cancel configuration changes using the icons available at the bottom of the LDC rate values screen.
What’s next
After reviewing and saving the LDC rate values, the user can:
- Navigate to the Generate billing items screen to verify that the configured rates are correctly reflected in the billing process.
- Review the invoice report to confirm that the applied charges match the defined rate structures.
- If adjustments are needed, the user can return to the LDC rate values screen to update or correct the charge tiers.