Configure addresses for end users and facilities
Configure addresses for end users and facilities functionality in nGenue allows you to maintain accurate address and contact information for both customers (end users) and their associated facilities. Correctly configuring addresses is essential for billing accuracy, regulatory compliance, and ensuring that important communications such as billing statements, service notifications, or critical day alerts, are delivered to the right contacts.
Point to remember
Before adding or updating addresses, the Contact functionality must be defined in the Global settings screen. Depending on whether Old contact or New contact is selected, the configuration path will differ:
1. Old contact – End user-level addresses are managed through the End user address screen.
2. New contact – End user-level addresses are configured via the Retail contact screen.
Process for adding an address using old contacts
When the old contact functionality is enabled, address details are maintained within the End user address screen.
Step 1: Configure address
To configure an address using the old contact functionality, follow the steps below:
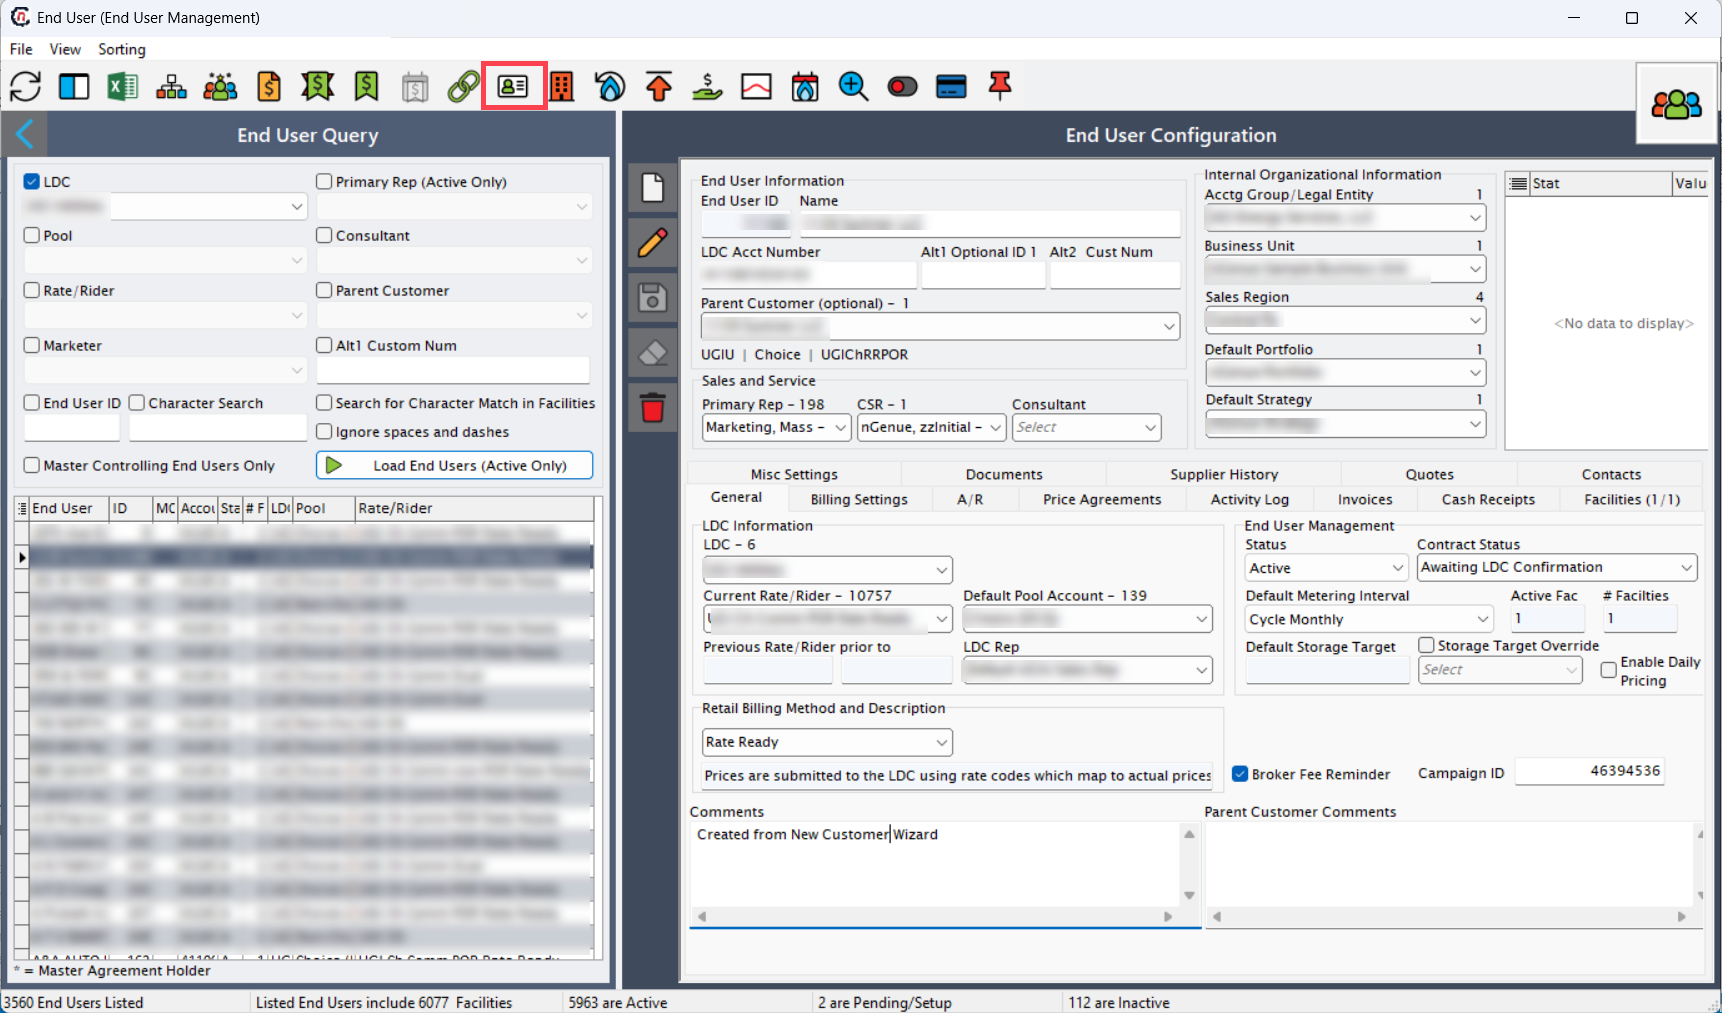
- Navigate to the End user screen and select the user you want to address.
- Click the End user level address icon in the top header to open the End user address screen.
-
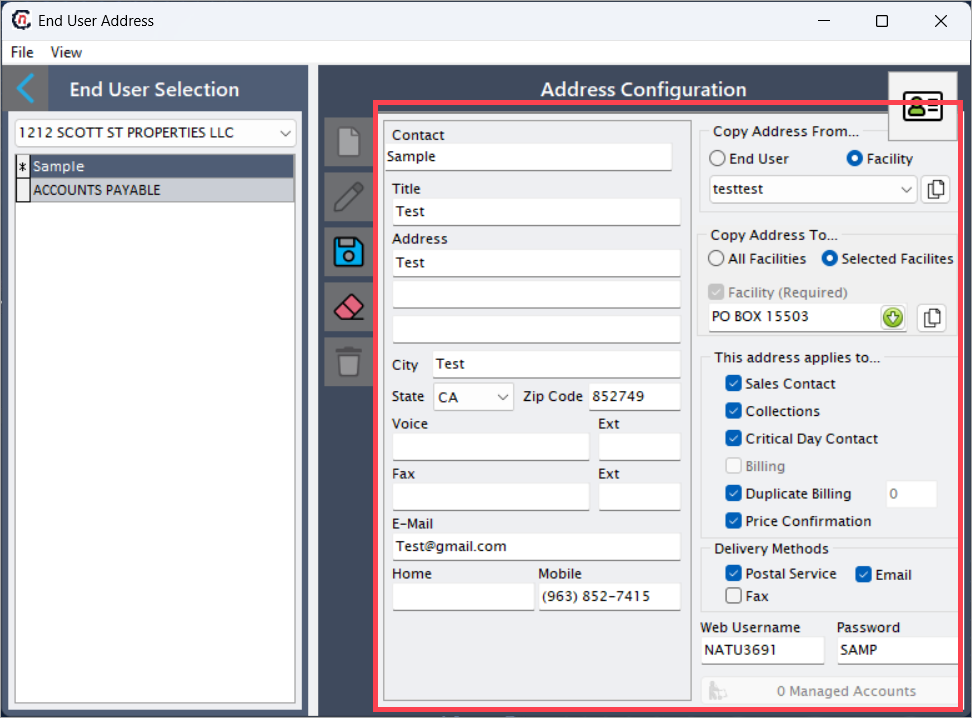
Enter the required details in the Address configuration section as described in the table below:
Fields Description Contact Enter the primary contact person’s name for communication and correspondence. Title Enter the job title or designation of the contact. Address Enter the street address or location. City Enter the contact's city. State Select the state or province where the contact resides. Zip code Enter the postal or zip code. Voice Enter the primary phone number for voice communication. Ext Enter the phone extension, if applicable. Fax Enter the fax number, if applicable. Ext Enter the fax extension, if applicable. E-mail Enter the email address of the contact. Home Enter the home phone number (optional). Mobile Enter the mobile phone number for direct contact. Copy address from Select End user or Facility, then choose the respective address from the dropdown and click Copy to reflect that address in the current record. Copy address to To copy the address to all facilities, select All facilities. To copy to specific facilities, select Selected facilities, then choose the specific facility in the Facility (Required) field (enabled when Selected facilities is chosen). This address applies to Select the applicable options:
• Sales contact: Marks this address as the primary sales contact for the end user.
• Collections: Uses this address for payment collection.
• Critical day contact: Uses this address for urgent notifications, such as service changes or critical updates.
• Billing: Reflects this address in billing documents and invoices (this checkbox is auto-selected and disabled when applicable).
• Duplicate billing: Uses the same address as the billing address. A small box next to the checkbox shows the number of duplicate billing addresses assigned.
• Price confirmation: Uses this address for price confirmation communications.Delivery methods Select one or more of the following:
• Postal service: For physical mail.
• Email: For digital communication.
• Fax: For document transmission.Web username Auto-populated based on Company name (from global settings screen) and End user ID. Password Auto-populated based on End user contact (if present) and End user address ID. Managed accounts Displays the number of accounts managed under this contact. -
Click Save to store the entered address details.
Process for adding an address using new contacts
When the new contact functionality is enabled in Global settings, address and contact management is centralized under the Retail contact screen. This approach is more flexible and scalable, as it supports contact reuse across multiple end users and facilities, reducing duplication and improving consistency.
Step 1: Create contact
- Navigate to the End user screen.
- Select LDC, click Load end users (Active only), then click the End user level addresses icon.
- The Retail contact home page opens. Click Add new contact.
-
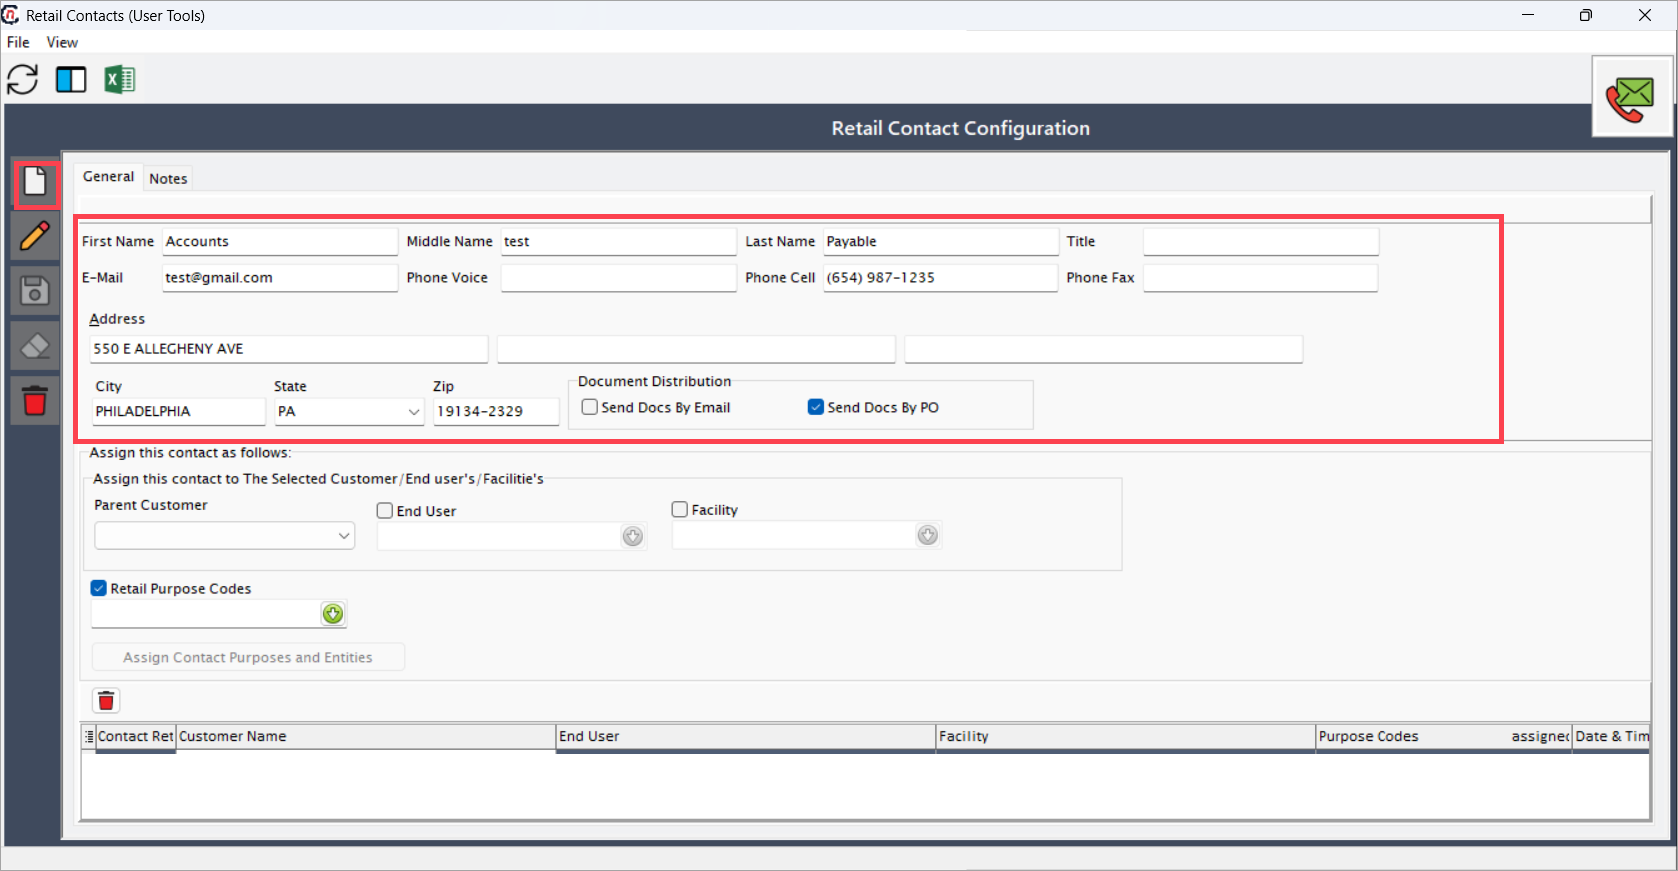
Enter contact details as per the table below:
Fields Description First name Enter the contact’s first name. Middle name Enter the contact’s middle name, if any. Last name Enter the contact’s last name. Title Enter the professional title or designation. E-mail Enter a valid email address. Phone voice Enter the primary phone number. Phone cell Enter the mobile number. Phone fax Enter the fax number, if available. Address Enter the full street address. City Enter the city. State Select the state from the dropdown. ZIP Enter the 8-digit postal code. -
Click Save to store the new contact information.
Step 2: Assign contact to end user or facility
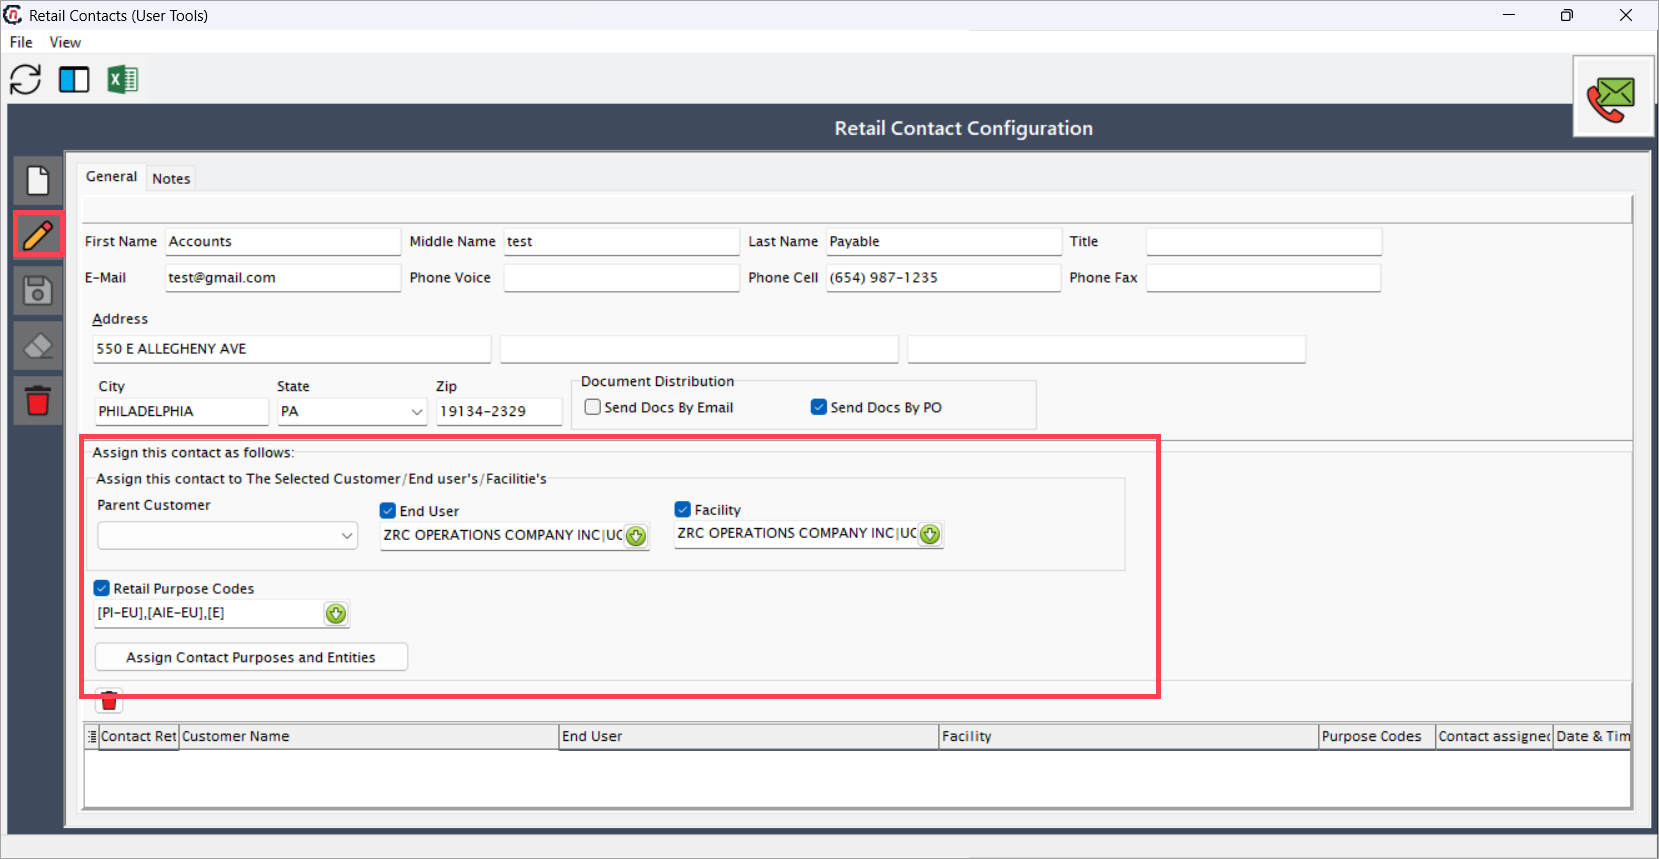
After creating a retail contact, the next step is to assign that contact to a specific end user or facility.
- Click the Edit icon next to the contact.
- In the Assign this contact as follows section, select End user or Facility, and choose the appropriate option from the dropdown.
- The Retail purpose codes will auto-populate.
- Click Save to apply the assignment.
Summary
Maintaining accurate addresses and contact assignments is crucial for smooth operations, efficient communication, and compliance with regulatory and billing requirements. By using either the old contact or new contact method, organizations can ensure that each end user and facility is associated with the correct address.
The old contact approach is suitable for maintaining existing workflows, while the new contact approach supports modern, centralized management. Leveraging features like Copy address from/to, This address applies to, and Delivery methods further ensures consistency and reduces manual errors across the system.