Configuring EDI enrollment calender
The EDI enrollment calender screen is used to configure and manage the enrollment submission schedules for each Local Distribution Company (LDC). This setup ensures that all enrollment records are submitted accurately and in alignment with the LDC’s business rules and operational timelines.
This configuration is essential for managing customer enrollments effectively within the system, as it defines the permissible submission dates for each pool and ensures proper synchronization between marketers and LDCs.
Prerequisites
Before configuring the EDI enrollment calender, ensure the following prerequisites are met:
- LDC is already configured and is active in the system.
- The pool details for the selected LDC is configured.
- You have the read and the write permissions to modify the EDI enrollment calender screen.
- Understand the LDC-specific enrollment cycle and submission requirements.
Procedure to configure EDI enrollment calender
Step 1. Navigate to the EDI enrollment calender screen
- Log in to the nGenue application.
- Click the Search icon and enter EDI enrollment in the search bar.
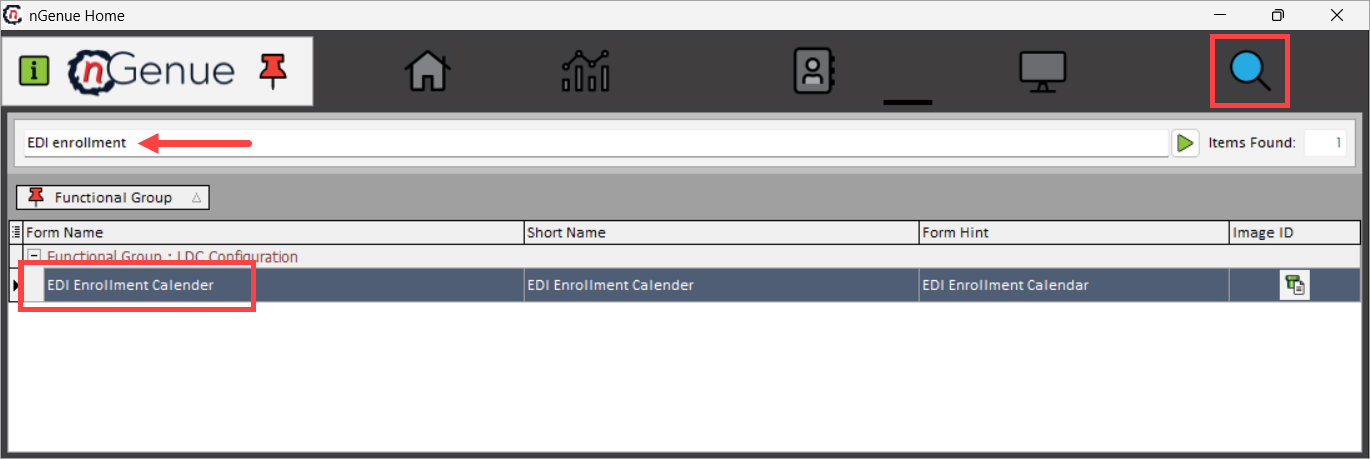
- Double-click EDI enrollment calender to open the respective screen.
-
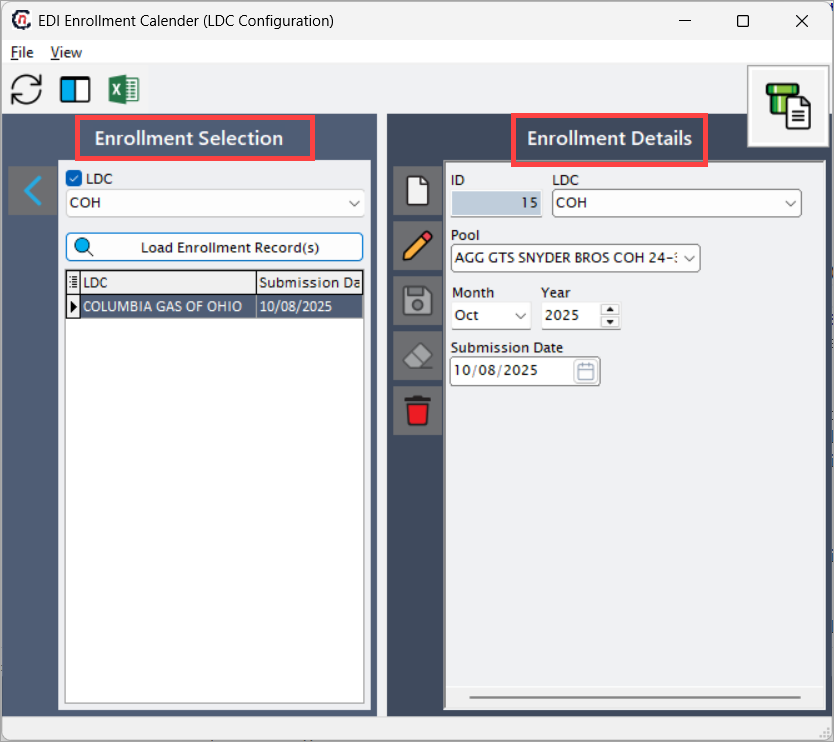
The next screen is divided into two sections: Enrollment selection and Enrollment details.
-
Enrollment selection: This section is used to search and load enrollment records based on the selected LDC. The key components include:
- LDC: A dropdown menu that lists all available LDC configured in the system. Select the LDC whose enrollment records you wish to view or configure.
- Load enrollment record(s): A button that, when clicked, retrieves all existing enrollment configurations associated with the selected LDC. The grid includes columns for pool names and their respective submission dates. It is helpful to confirm whether a configuration already exists before adding new records.
-
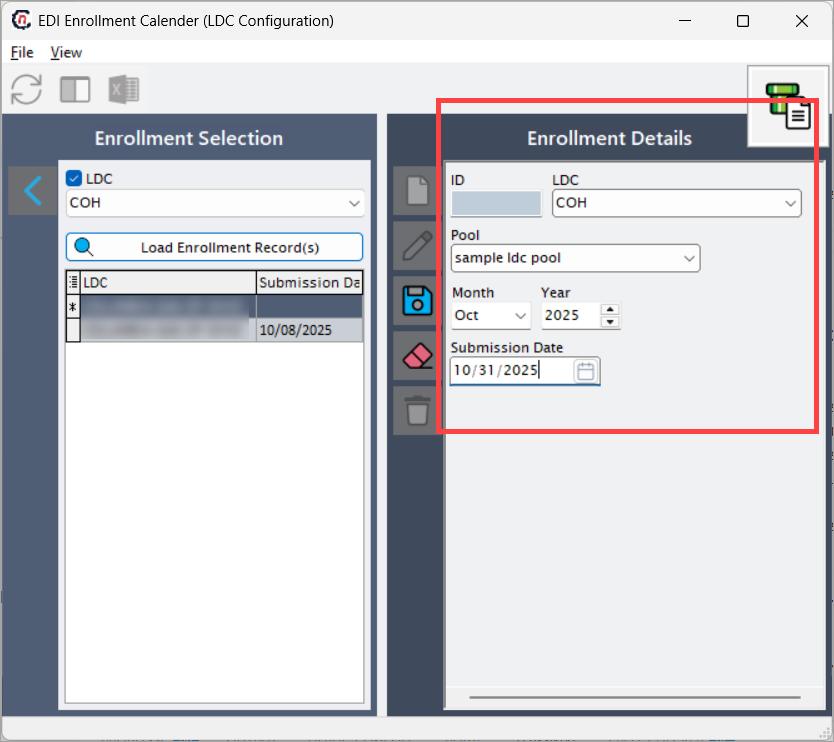
Enrollment details: This section is used to create, view, or modify specific enrollment records for the selected LDC. Each record represents one valid enrollment submission configuration.
The table below describes the available icons and their functions:Icons Description 
Allows creation of a new enrollment configuration. 
Enables editing of an existing record. 
Saves the created or updated record. 
Cancel the updates being made to the enrollment record. 
Delete the selected enrollment configuration. 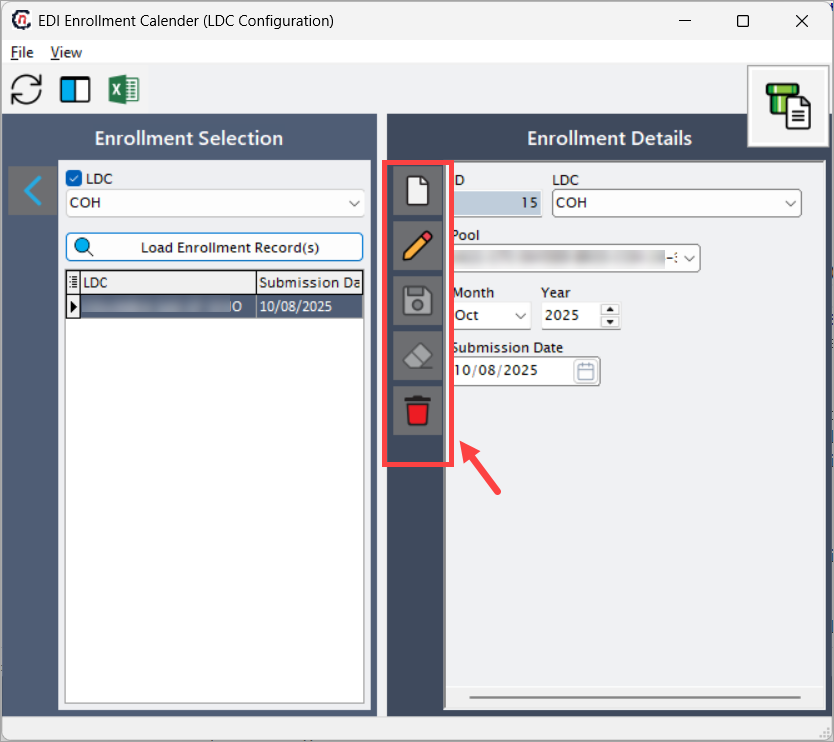
-
Step 2: Create a new enrollment configuration
- In the Enrollment selection section, select the desired LDC from the LDC dropdown.
- In the Enrollment details section, click the Add button.
-
Provide the following details:
- LDC: Displays the LDC name selected in the left panel. It indicates which LDC the record is associated with. When you select a different LDC, a new enrollment is configured and gets displayed under the LDC you have selected.
- Pool: Select the LDC pool associated with the enrollment record. Each pool can have different enrollment submission dates depending on LDC requirements.
- Month: Select the applicable month from the dropdown for which the enrollment submission is valid.
- Year: Specify the year to which the enrollment schedule applies.
- Submission date: Enter the exact date on which the enrollment must be submitted. This is a calender field to specify the exact date when enrollment data must be submitted for the selected LDC and pool. This is a mandatory field.
-
Click the Save icon to store the configuration.
-
The newly created record appears in the grid under Enrollment selection section.
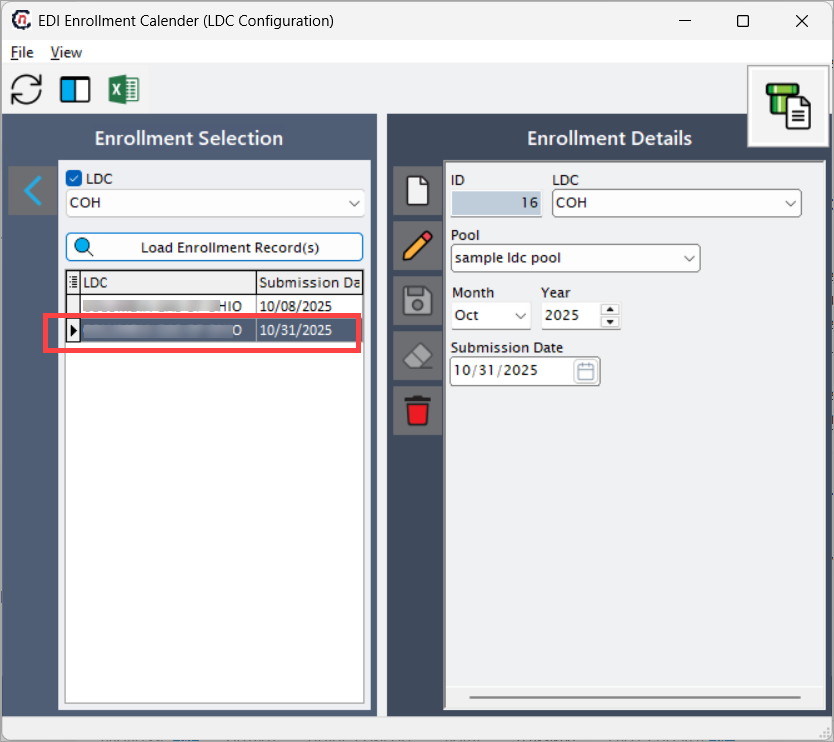
Note
A unique system-generated identifier for each enrollment record is displayed in the ID field when you save the record.
Step 3: Edit or delete an enrollment record (if needed)
-
To modify an existing record:
- Select the record from the grid.
- Click the Edit icon.
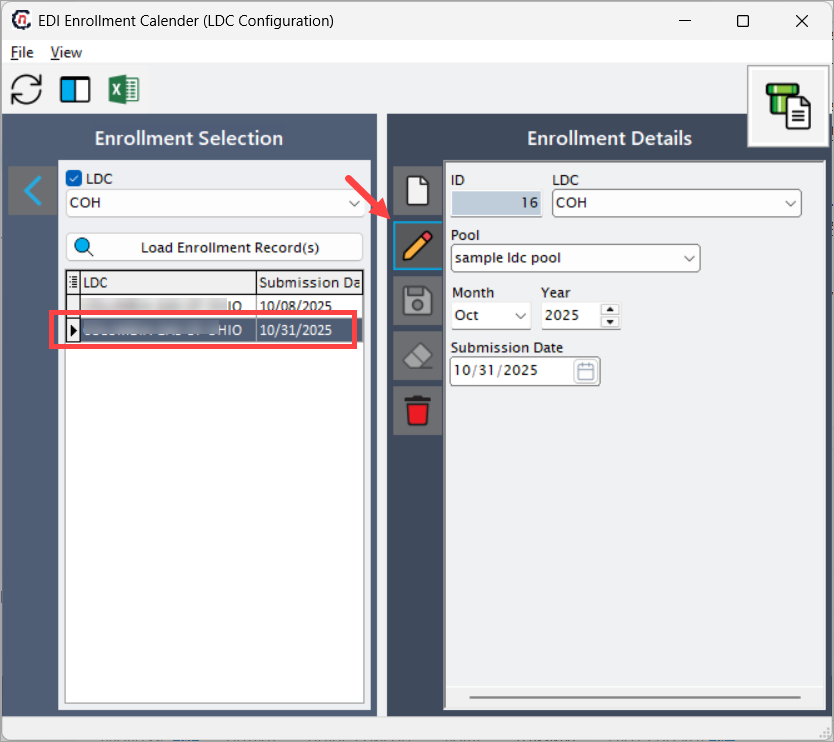
- Update the required fields.
- Click Save.
-
To delete a record:
- Select the record.
- Click the Delete icon.
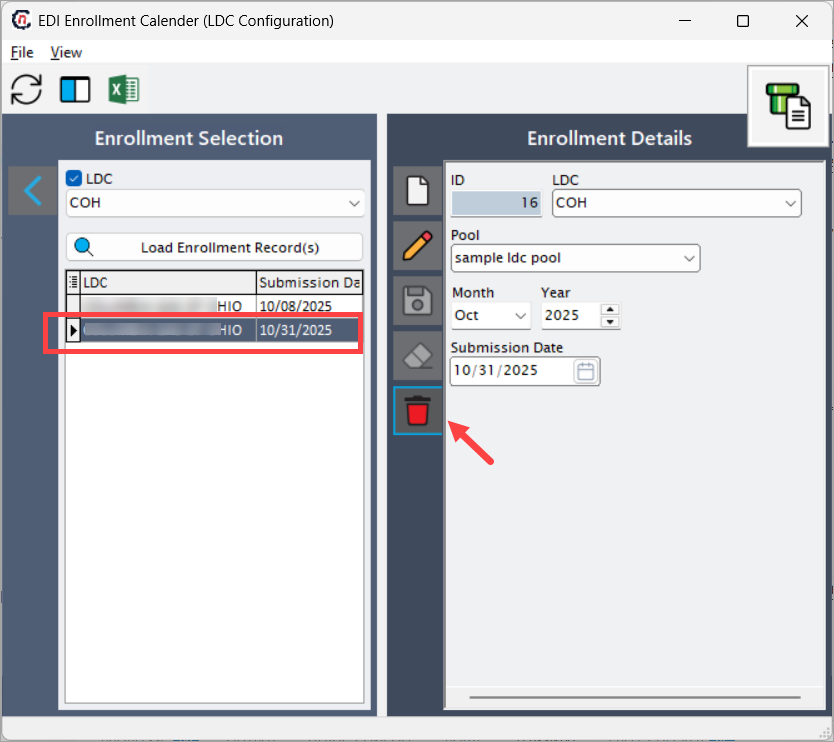
- Confirm the deletion when prompted.
Example scenarios
Scenario 1: Adding a new enrollment date
You need to configure the enrollment schedule for LDC ABC Gas for pool ABC-Pool. The LDC has communicated that the enrollment submission for January 2025 must be made by 10-Nov-2025.
To configure:
- Select LDC = ABC Gas.
- Click on Add icon.
-
Set:
- Pool = ABC-Pool
- Month = January
- Year = 2025
- Submission date = 10/11/2025
-
Click Save.
This ensures that marketers submitting enrollments after this date are flagged as late.
Scenario 2: Modifying an existing schedule
If the LDC ABC updates the submission date to 10-Dec-2025, select the existing record, click Edit, update the date, and save the changes.
What’s next
Once enrollment records are configured:
- The system uses these dates to validate and schedule EDI enrollment submissions.
- Marketers and administrators can reference this configuration to plan and manage enrollment processes.
- If LDC submission cycles change, revisit this screen to update the corresponding records.
Summary
The EDI enrollment calender configuration ensures accurate and timely submission of enrollment data to local distribution companies. By defining month-specific submission dates per pool, the system maintains compliance with LDC operational rules and prevents errors in customer onboarding. This centralized configuration simplifies scheduling, enhances coordination with LDCs, and improves data accuracy in EDI processes.