Configuring menu category and layouts
Configuring a menu category involves grouping related screens under a single category to streamline navigation. Users can assign screens to a category, define their order. This setup helps organize the interface efficiently, ensuring that related functionalities are easily accessible under a well-defined menu structure.
Prerequisites
- You have the necessary permission to add or modify the Menu configuration screen.
Procedure to configure menu category
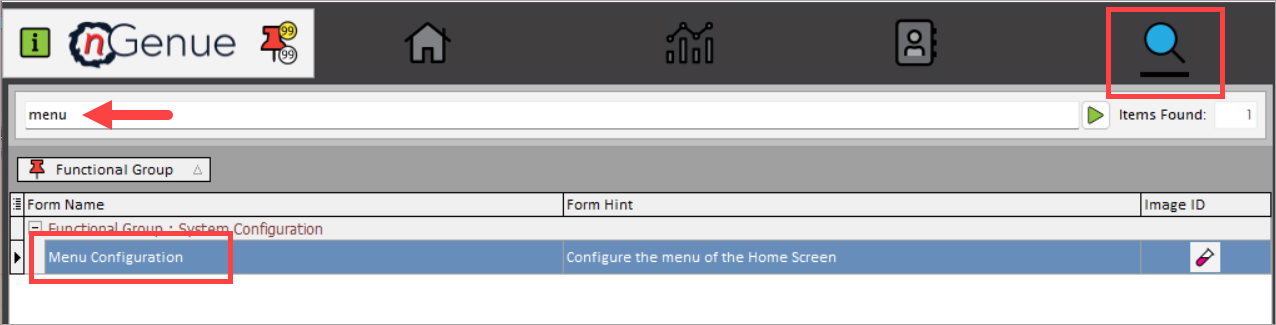
Step 1: Navigate to the Menu configuration screen
-
Log in to the nGenue application.
-
Click the Search icon and enter menu in the search bar.
-
Double-click Menu configuration to open the respective screen.
- In the Menu configuration screen, click on → Category button.
- The next screen is divided into two sections: Category listing and Category details.
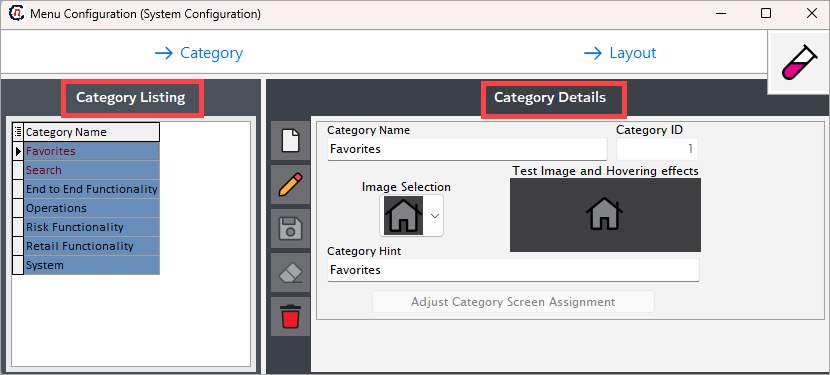
- The Category listing section lists existing menu categories configured within nGenue.
-
The Category details section allows you to create, edit, or delete menu categories. The table below describes the available icons and their functions:
Icons Description 
Add a new menu category record 
Edit the menu category record detail. 
Save the menu category record. 
Cancel the updates being made to the menu category record. 
Delete a menu category record.
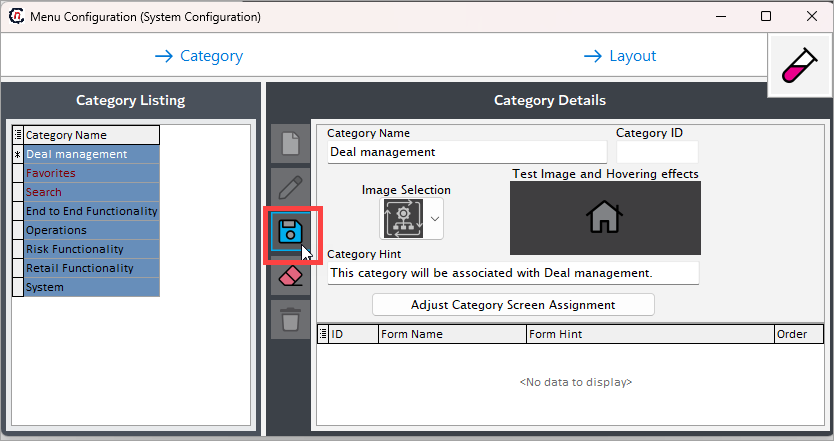
Step 2: Create a new category record
- Click on the Add a category record icon.
-
On the next screen, fill in the below details:
- Category name: Give a name to the menu category. For example: Deal management.
- Category ID: This field is auto generated when you save the category.
- Image selection: Choose an image to display for your category.
- Category hint: Enter a detailed description for the menu category.
-
Save the changes.
Step 3: Assign screens to category
- Click the Adjust category screen assignment button to assign screens to your menu category.
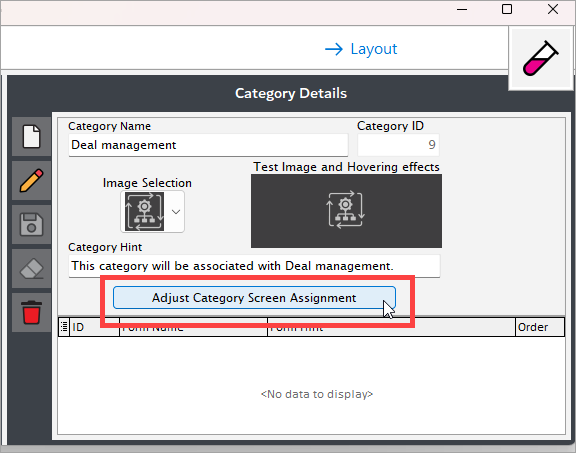
- This will open a new popup screen where you will need to assign screens (using left/right/top/bottom arrow keys) to the newly created category.
-
Click Accept changes to save the configuration.
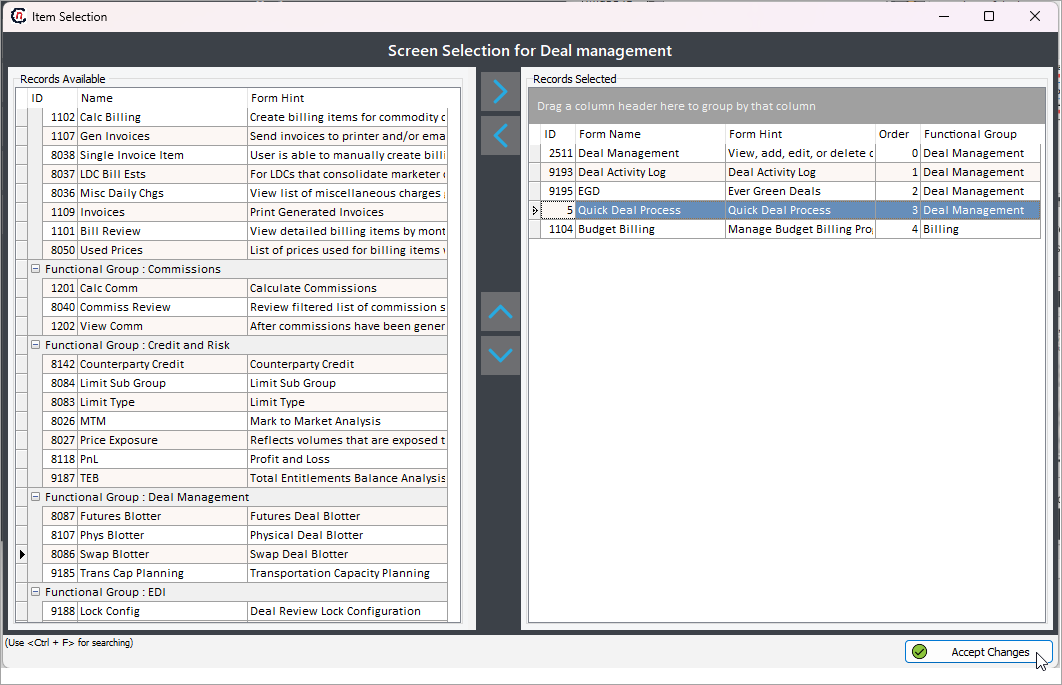
-
The assigned screens will reflect in the Category details section.
Procedure to configure menu layouts
Step 1: Navigate to the Menu configuration screen
-
Log in to the nGenue application.
-
Click the Search icon and enter menu in the search bar.
-
Double-click Menu configuration to open the respective screen.
- In the Menu configuration screen, click on → Layout button.
- The next screen is divided into two sections: Layout listing and Layout details.
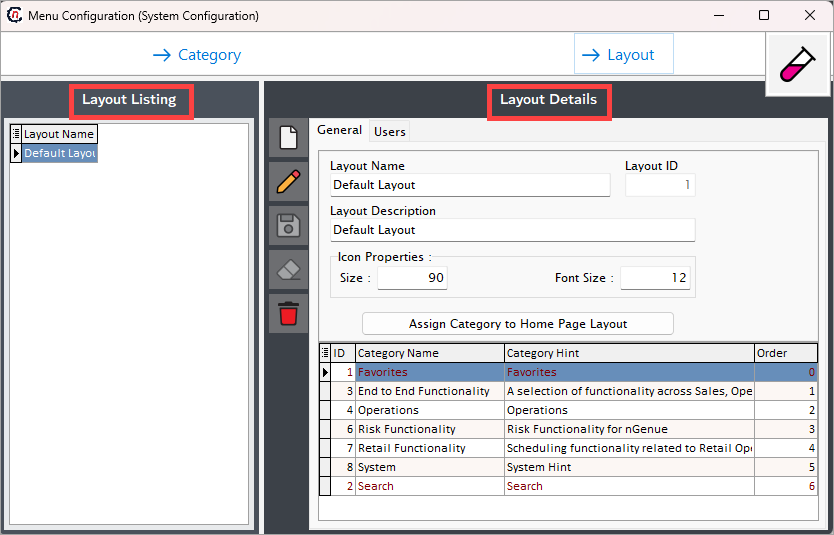
- The Layout listing section lists existing menu layouts configured within nGenue.
-
The Layout details section allows you to create, edit, or delete menu layouts. The table below describes the available icons and their functions:
Icons Description Add a new menu layout record Edit the menu category layout detail. Save the menu layout record. Cancel the updates being made to the menu layout record. Delete a menu layout record.
Step 2: Create a new category layout
- Click on the Add a new layout record icon.
-
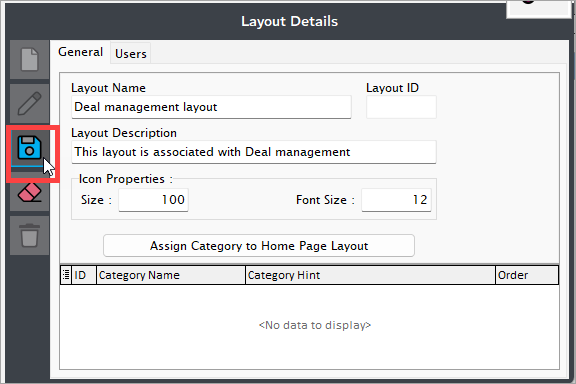
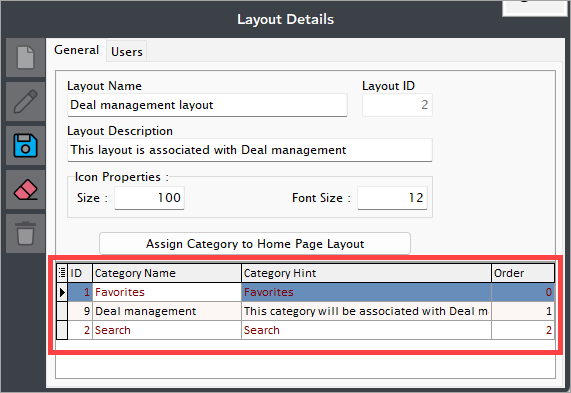
In the General tab, fill in the below details:
- Layout name: Give a name to the menu layout. For example: Deal management layout.
- Layout ID: This field is auto generated.
- Icon properties:
- Size: Enter the screen size to display proper screen images in menu category.
- Font size: Enter the screen name font size to display in the menu category.
-
Save the changes.
Step 3: Assign category to layout
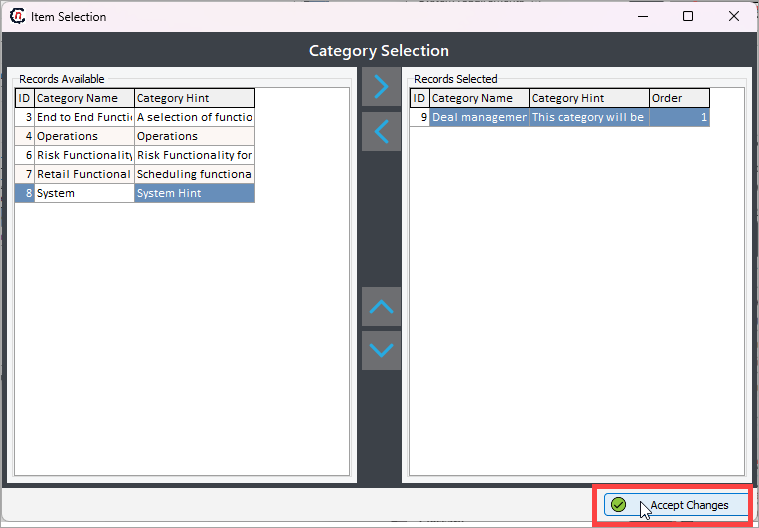
- Click the Assign category to home page Layout button to assign a category or categories to the layout.
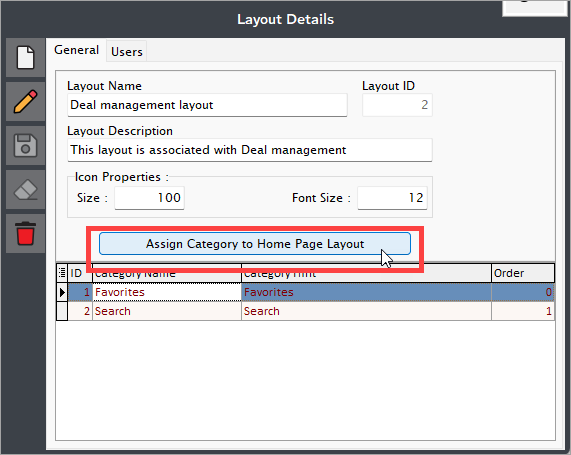
- This will open a new popup screen where you will need to assign categories (using left/right/top/bottom arrow keys) to your layout.
-
Click Accept changes to save the configuration.
-
The assigned categories will reflect in the Layout details section.
Note
- Favorites and Search categories are automatically added to any layout by default.
- Restart the nGenue application to view the layout changes.